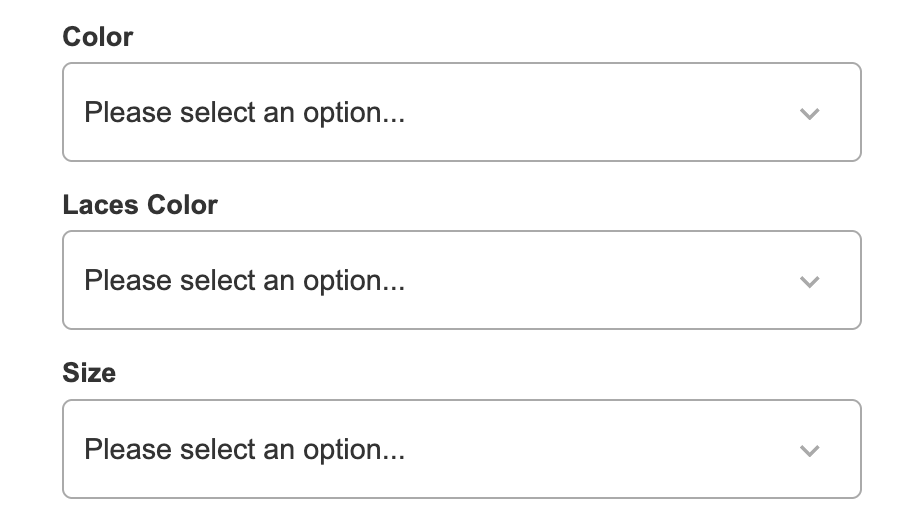
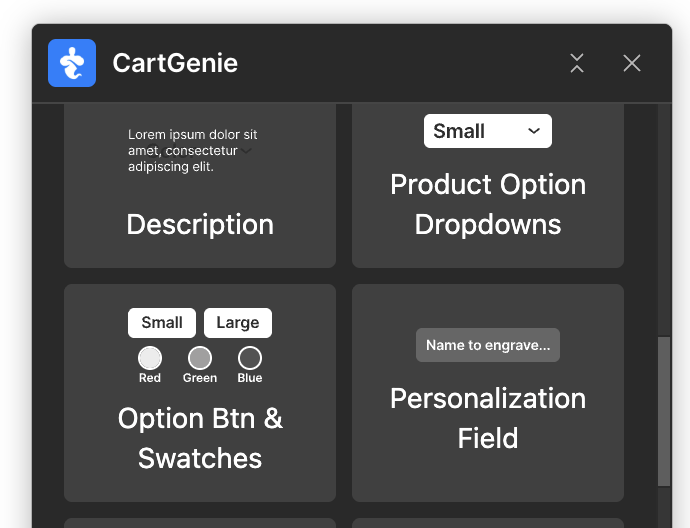
By default, CartGenie’s product page template includes dropdown options for each option set. However, you can also switch this out for a button or swatch style display instead.
The swatches & buttons can be used on your product template page and on product list pages with a CMS list block!


Here is a video walkthrough or you can use the step by step instructions below:
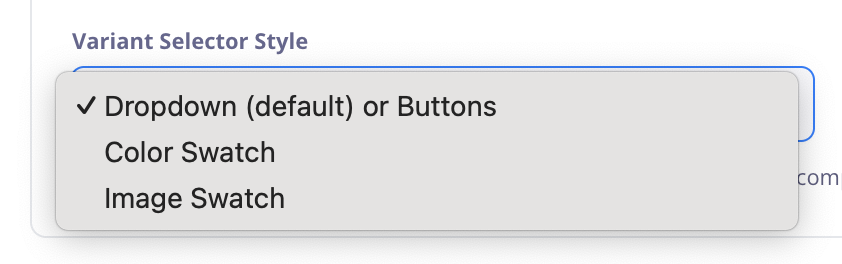
Open a product in CartGenie and go to the variants tab. Then, open up an option set and choose your preferred Variant Selector Style.
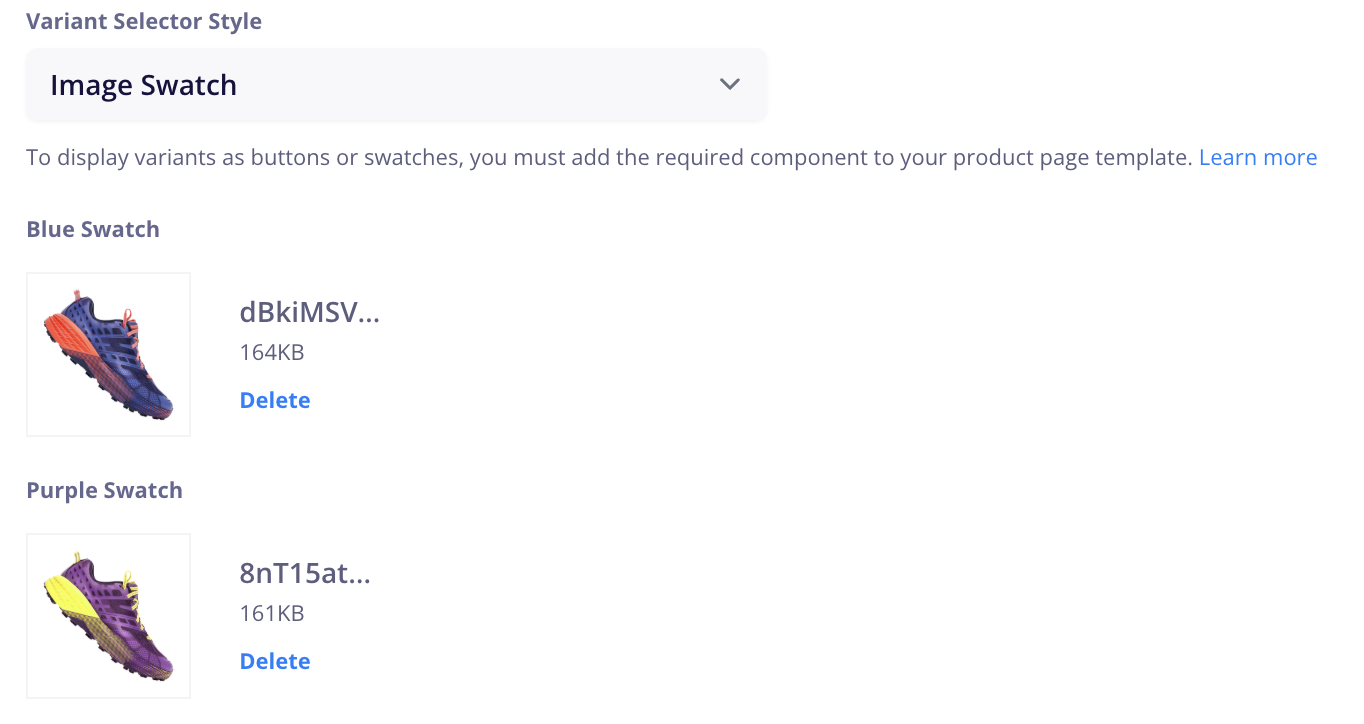
If you select an image swatch, you will see image upload boxes to add an image for each option value.
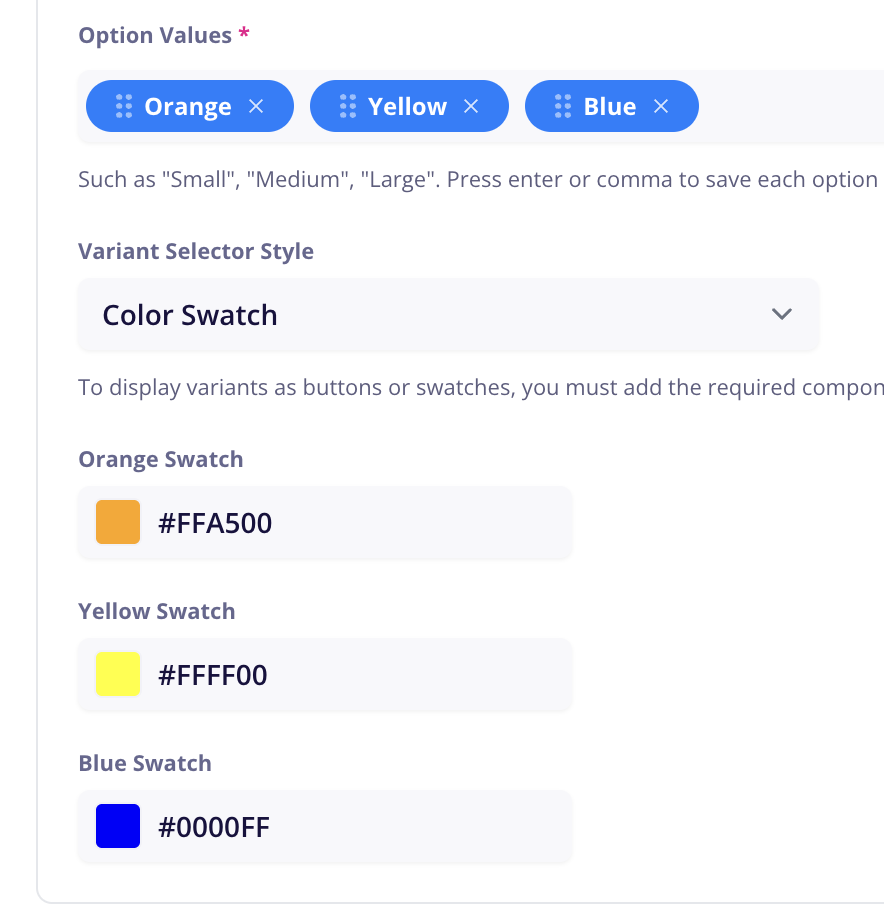
The color swatch option will automatically pick colors based on your option values. You can edit these hex values as needed.
Once done, publish your product.
Go to your Webflow site and open the Product Template page.
Delete the 3 option dropdowns section of the template.
Then open CartGenie’s designer extension and navigate to Create Product Pages > Components > Product.
Click to copy the Option Btn & Swatches block and paste in the previous location of your dropdowns.
You will now see 3 option sets with buttons and swatches. Each option set must include all types of swatches in order to support using them in any order on all products.

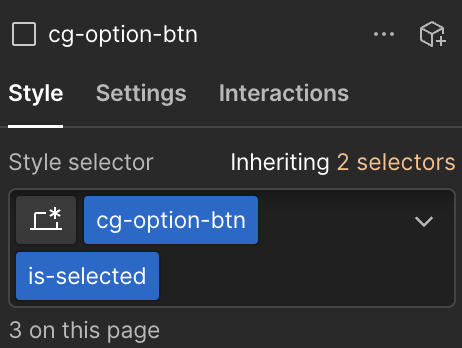
The 2nd set has a class added to it for “is-selected”. This allows you to style how the selected state will look.
The 3rd set has a class added to it for “is-out”. This allows you to style how the option will look when that product option is out of stock.
Click and select each of the “cg-option-btn” layers for sets 2 and 3.
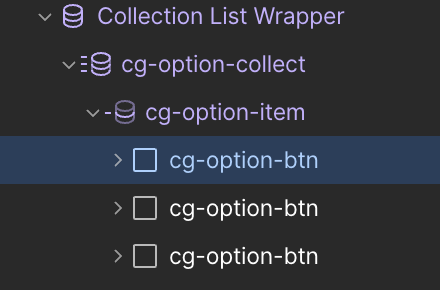
Then, remove these extra classes (“is-selected” & “is-out”) to show the default state for each option set.
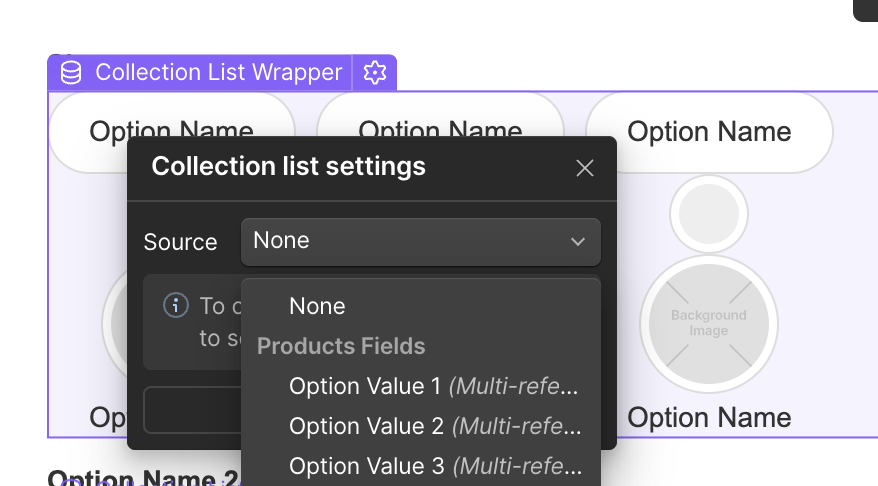
In order to pull in your product’s options for each button and swatch, you must connect each element to the corresponding CMS field.
First, select each of the Collection Lists and connect them in order to:
Option Value 1
Option Value 2
Option Value 3
Then for each option set, select the Option Names at the top of each and connect them in order to:
Option Name 1
Option Name 2
Option Name 3
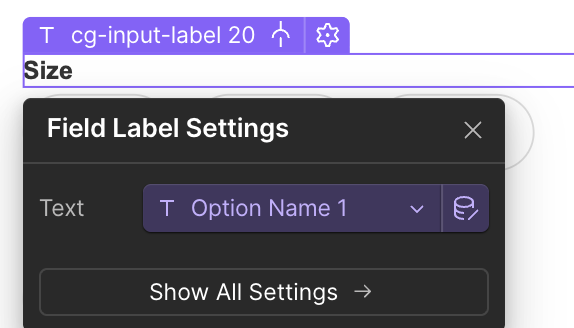
Next, select the first button type and in the layer settings, connect it to “Option Name”
Then, select the interior div of the small circles and connect the “Get BG Color” to “Color Swatch”
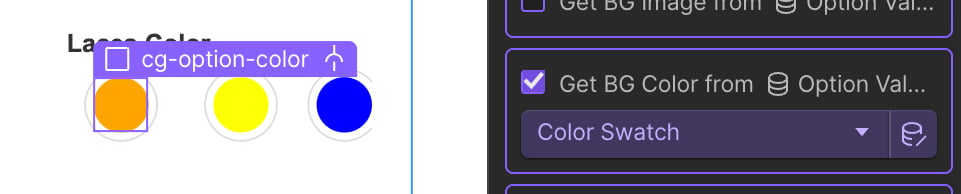
Note: The background color may be blank as this particular option set on your product might not include a color swatch style.
Next, select the interior div of the larger circles and connect the “Get BG Image” to “Image Swatch”

Note: The background image may be blank as this particular option set on your product might not include an image swatch style.
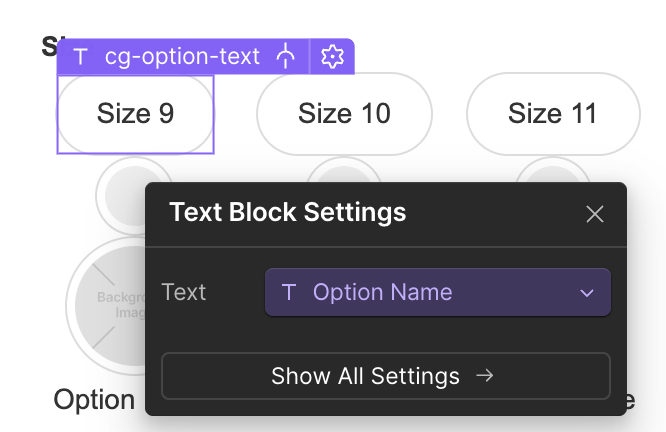
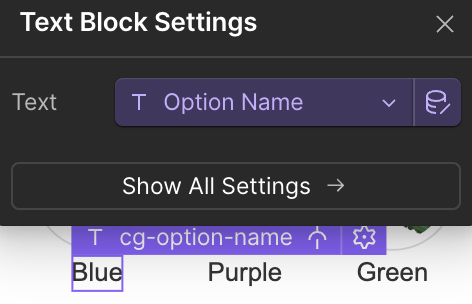
Finally, select the last “Option Name” text and connect it to “Option Name”
Connect these same fields for all 3 option sets.
Once done all 3 sets, you’re ready for the next step!
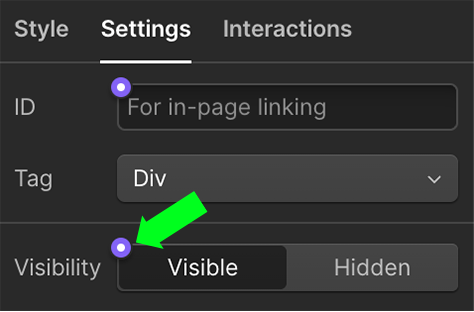
In order for your site to only show the selected swatch type, you will need to set conditional visibility for each set of swatches. You will need to do this for all three collection lists.
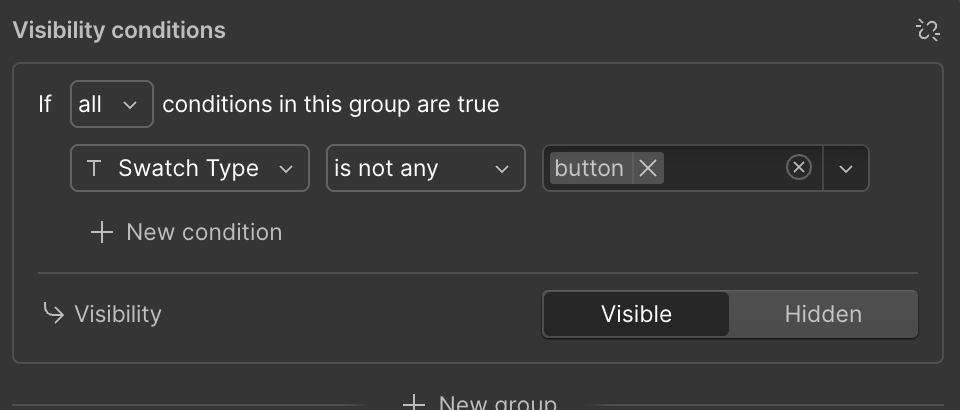
First, in the first option set, select the 1st “cg-option-btn” layer. (which contains a set of buttons).
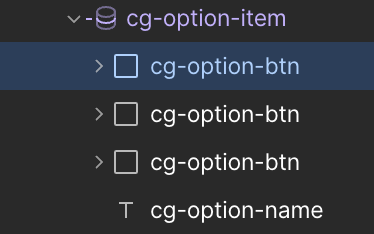
Go to the layer settings, and click on the purple dot in the Visibility section.
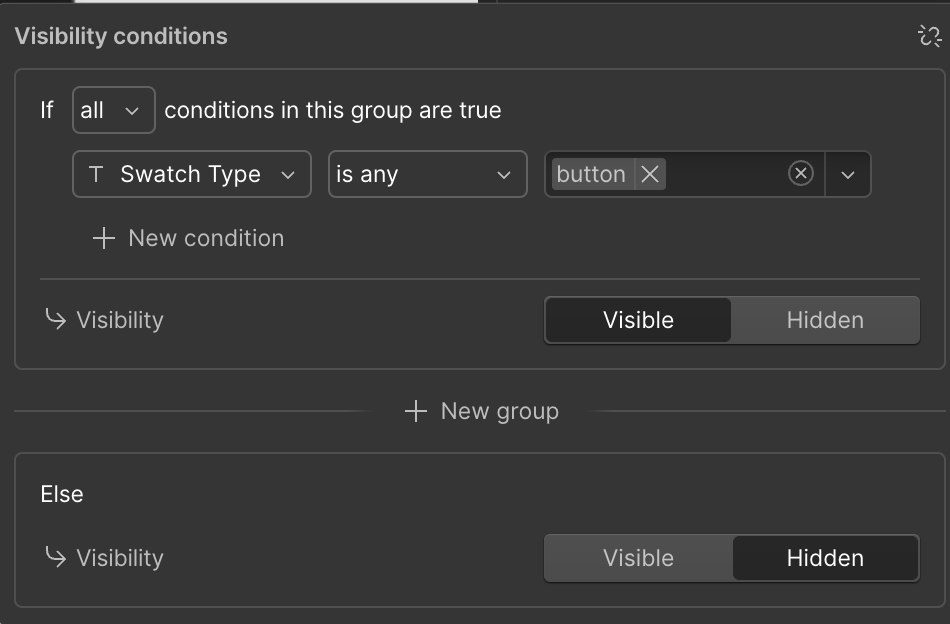
Set element to be visible when “Swatch Type” is any “Button”.
Then, select the 2nd “cg-option-btn” layer. (which contains a set of color swatches).
Go to the layer settings, and scroll down to “Conditional Visibility”.
Set element to be visible when Swatch Type is any “Color”.

Then, select the 3rd “cg-option-btn” layer. (which contains a set of image swatches).
Go to the layer settings, and scroll down to “Conditional Visibility”.
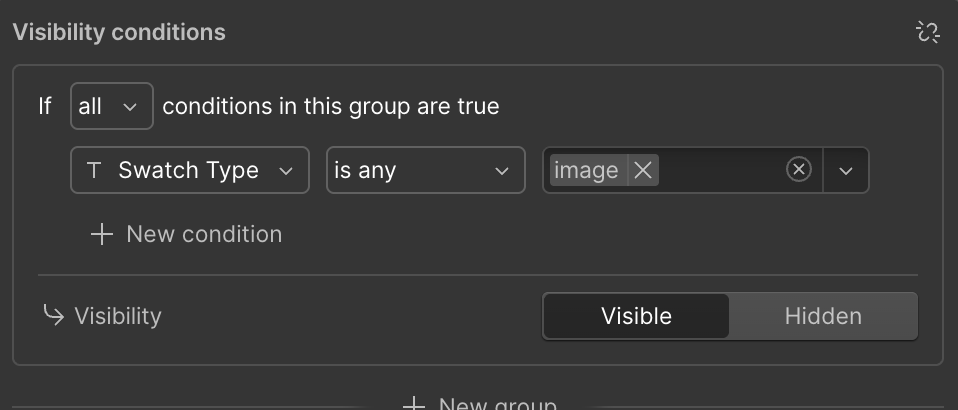
Set element to be visible when Swatch Type is any “Image”.
Lastly, select the “cg-option-name” text layer and go to conditional visibility.
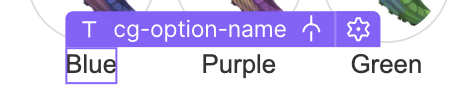
Set element to be visible when Swatch Type is NOT any “Button”
(this allows the name layer to show up below color and image swatches only)
Now, be sure to do these same steps for all 3 Collections.
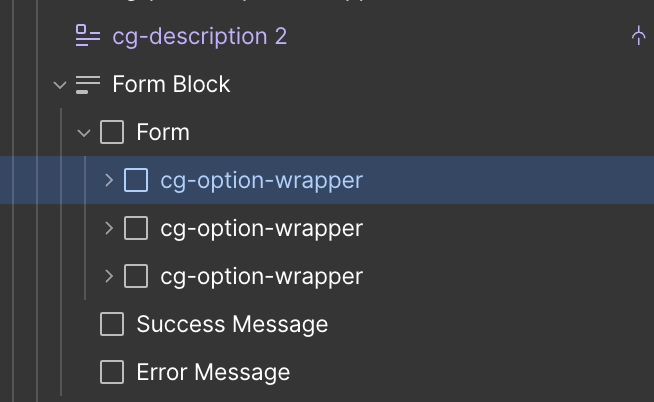
Now, we need to set the conditional visibility of each option set in case your product only has 1 or 2 option sets. This will prevent flashing on page load.
Go to your layers panel and collapse the layers until you find the 3 option set wrappers titled “cg-option wrapper”
Select the first one and then go to the layer Settings > Visibility panel and set it to be conditionally visible when “Option Name 1” is set.
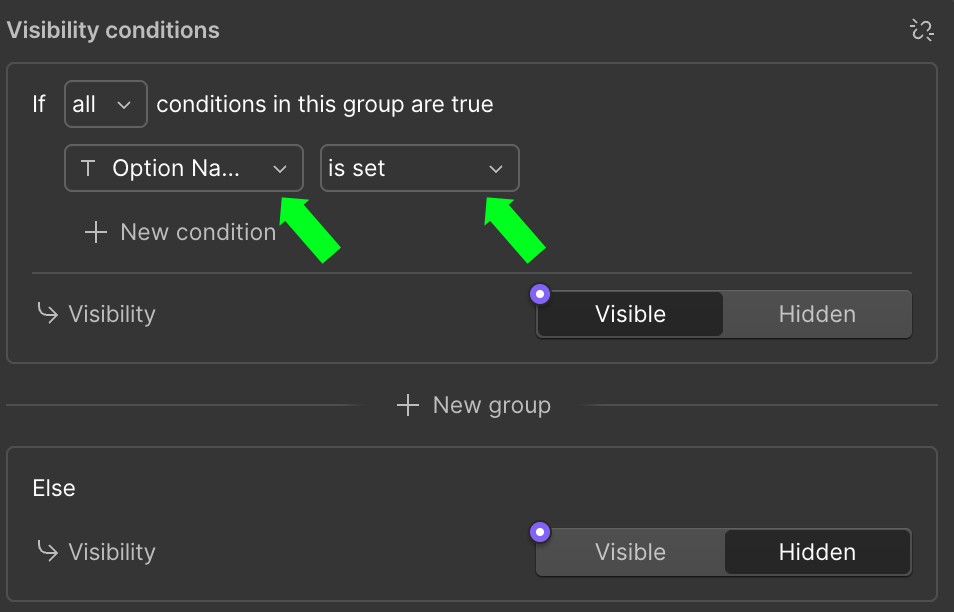
Then, select the 2nd cg-option-wrapper and set it to be visible when “Option Name 2” = is set.
Finally, select the 3rd cg-option-wrapper and set it to be visible when “Option Name 3” = is set.
Once done, publish your Webflow site.
You should now see all your option sets live which customers can now use to select their preferred options!

CartGenie’s swatch component also works when used on CMS product lists like on your homepage or shop page!
You will need to use CartGenie’s Product Card & Btn component and then replace the drop downs with the swatches component.


Since the list page space is likely much smaller, you can assign custom styles to these swatches to make them smaller to fit better.
