CartGenie doesn't currently support Webflow Localization (it is on our roadmap), but you can still translate your store through other front-end only methods such as Localize or Weglot.
If you want to offer your store in multiple languages, we recommend using Localize as a front-end translation layer. Localize works by watching your site's text — including content CartGenie injects after page load — and swapping it for translated versions on the fly. No duplicate products, no separate CMS entries, no code changes to your store.
Weglot is the more polished, better-known product with a stronger dashboard, built-in multilingual SEO features (hreflang tags, translated URLs, subdirectories) — but its architecture parses the DOM at page load, which means CartGenie's injected cart and checkout elements require manual CSS selector configuration in the Weglot dashboard and ongoing maintenance whenever CartGenie's markup changes. If you are comfortable doing this, Weglot can be a good option. However, it takes more manual work than Localize.

Localize is less flashy and its dashboard is more utilitarian, but it's purpose-built for JavaScript-heavy apps: it continuously monitors the DOM and automatically picks up CartGenie's injected content without any selector mapping, trading a one-time discovery pass (clicking through cart and checkout states once) for Weglot's ongoing selector maintenance.
In short, Weglot wins on polish and SEO tooling; Localize wins on out-of-the-box automation and architectural fit with CartGenie — and for stores where the cart and checkout are the highest-stakes surfaces to get right, that architectural fit is usually the more important factor.
Sign up at localizejs.com and create a new Website / Web App project. Select the target language you want to offer. You can add more languages later.
Once the project is created, Localize will give you a project key and a code snippet. Keep that tab open — you'll need the snippet in the next step.
In your Webflow project, go to Site Settings → Custom Code.
Paste the Localize snippet into the Head Code section. It should be the full snippet Localize provides, including the Localize.initialize({ key: '...' }) block.
Click Save Changes.
Publish your Webflow site so the snippet goes live.
For the full snippet reference, see Localize's Quickstart for Web.
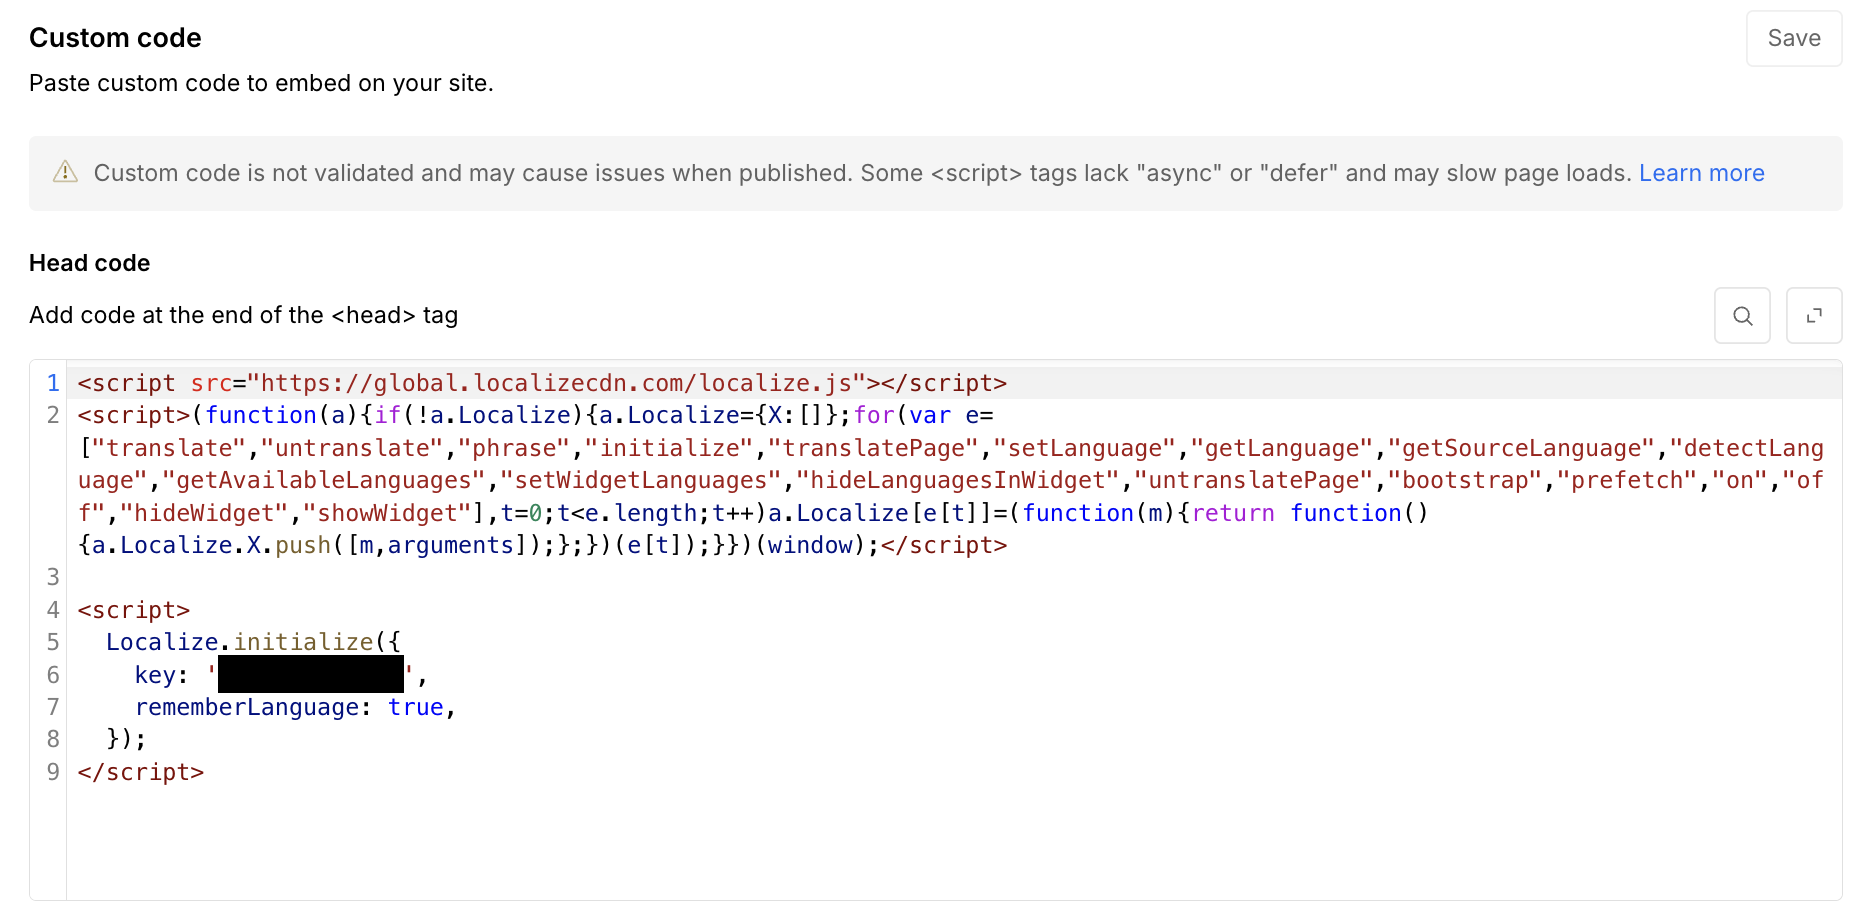
By default, Localize sends new phrases to a "Pending" bin and waits for you to approve each one before translating. For most CartGenie stores, you'll want translations to happen automatically as new content is discovered. To enable this:
Add the following line to your script code right after the “rememberLanguage: true” line:
autoApprove: true,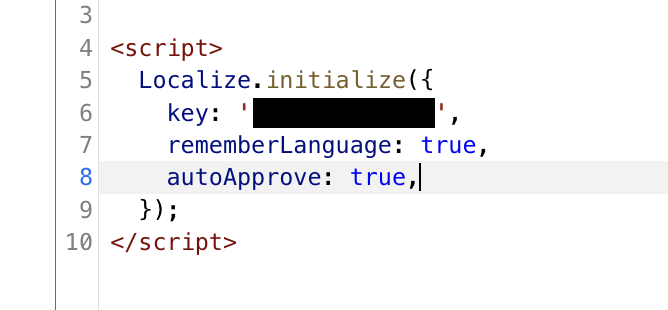
You can still go in and edit any translation later if you want to refine wording.
This is the most important step for CartGenie stores, and it's the one that's specific to how CartGenie works.

Walk through your site in your source language and make sure you hit each of the following:
Every page type: home, collection/category pages, individual product pages, about, contact, any blog posts, policy pages
Product interactions: variant selectors, quantity pickers, "Add to cart" buttons, any product option labels (loading a list page with option drop downs can solve this in one swoop)
Cart states: cart drawer open with items, empty cart state, cart quantity updates, item removal
Checkout flow: every step of the checkout, all form field labels and placeholders, validation errors (try submitting with missing fields to surface error text), shipping method selection, payment step
Confirmation and post-purchase: order confirmation page, any transactional messaging
After each interaction, phrases should start appearing in your Localize dashboard under Manage Phrases. This is a one-time exercise — once these states have been seen, CartGenie content flowing through the same components will be translated automatically.

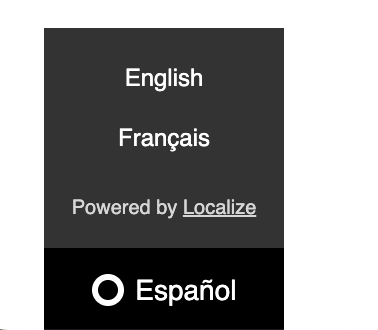
Localize includes a default language-switching widget that appears automatically once the snippet is installed. You can customize its position, appearance, and behavior in your Localize dashboard under Widget.
If you'd rather build a custom switcher that matches your Webflow design, Localize supports that too. See their widget customization docs for options.
You're live!
New content you add to your Webflow site or new products you add to CartGenie will be automatically detected and translated the first time they're loaded.