Welcome to CartGenie! 🧞♂
We’re excited to have you on board.
The template setup process is very similar to that of a brand new site, but with a few notable exceptions that we’ll highlight here.
If you haven’t already done so, find the CartGenie compatible template you want to use and clone it to your Webflow account.

Once you’ve cloned the base template, the very first step is to delete the existing CartGenie custom code. This will be added back later when you install the app, which will add a script specific to your account.
Go to your project settings > custom code and delete the 2 CartGenie scripts.

Next, you’ll want to create your CartGenie account. This is what allows you to create products, process customer checkouts, manage orders, and more!
Create a Free CartGenie AccountIn the first step of signup, be sure to select your newly cloned template site and authorize it to CartGenie.
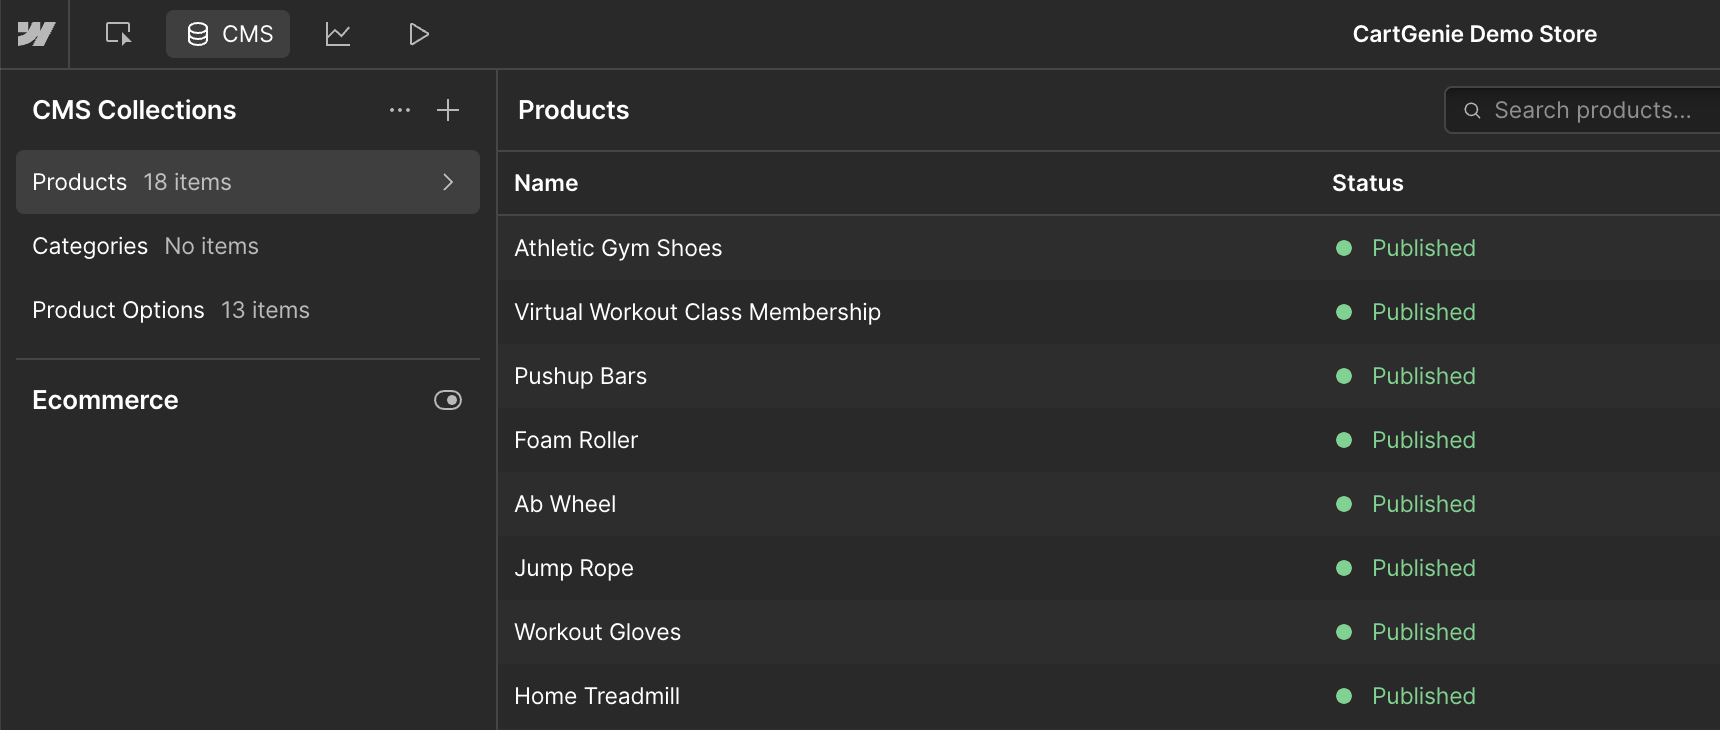
Most templates will come with placeholder products that give you an idea of how a template will look when its live. However, CartGenie cannot automatically import these products when you connect your site. So, we should delete them before creating your own products.
To do this, go to your Webflow site and go to the CMS tab at the top left of the page. Navigate to the Products collection and select all items and delete.
Next, delete all items in the Categories and Product Options
Go through all the steps of the Setup Guide to finalize your CartGenie account, create products, connect your payment gateway, etc.
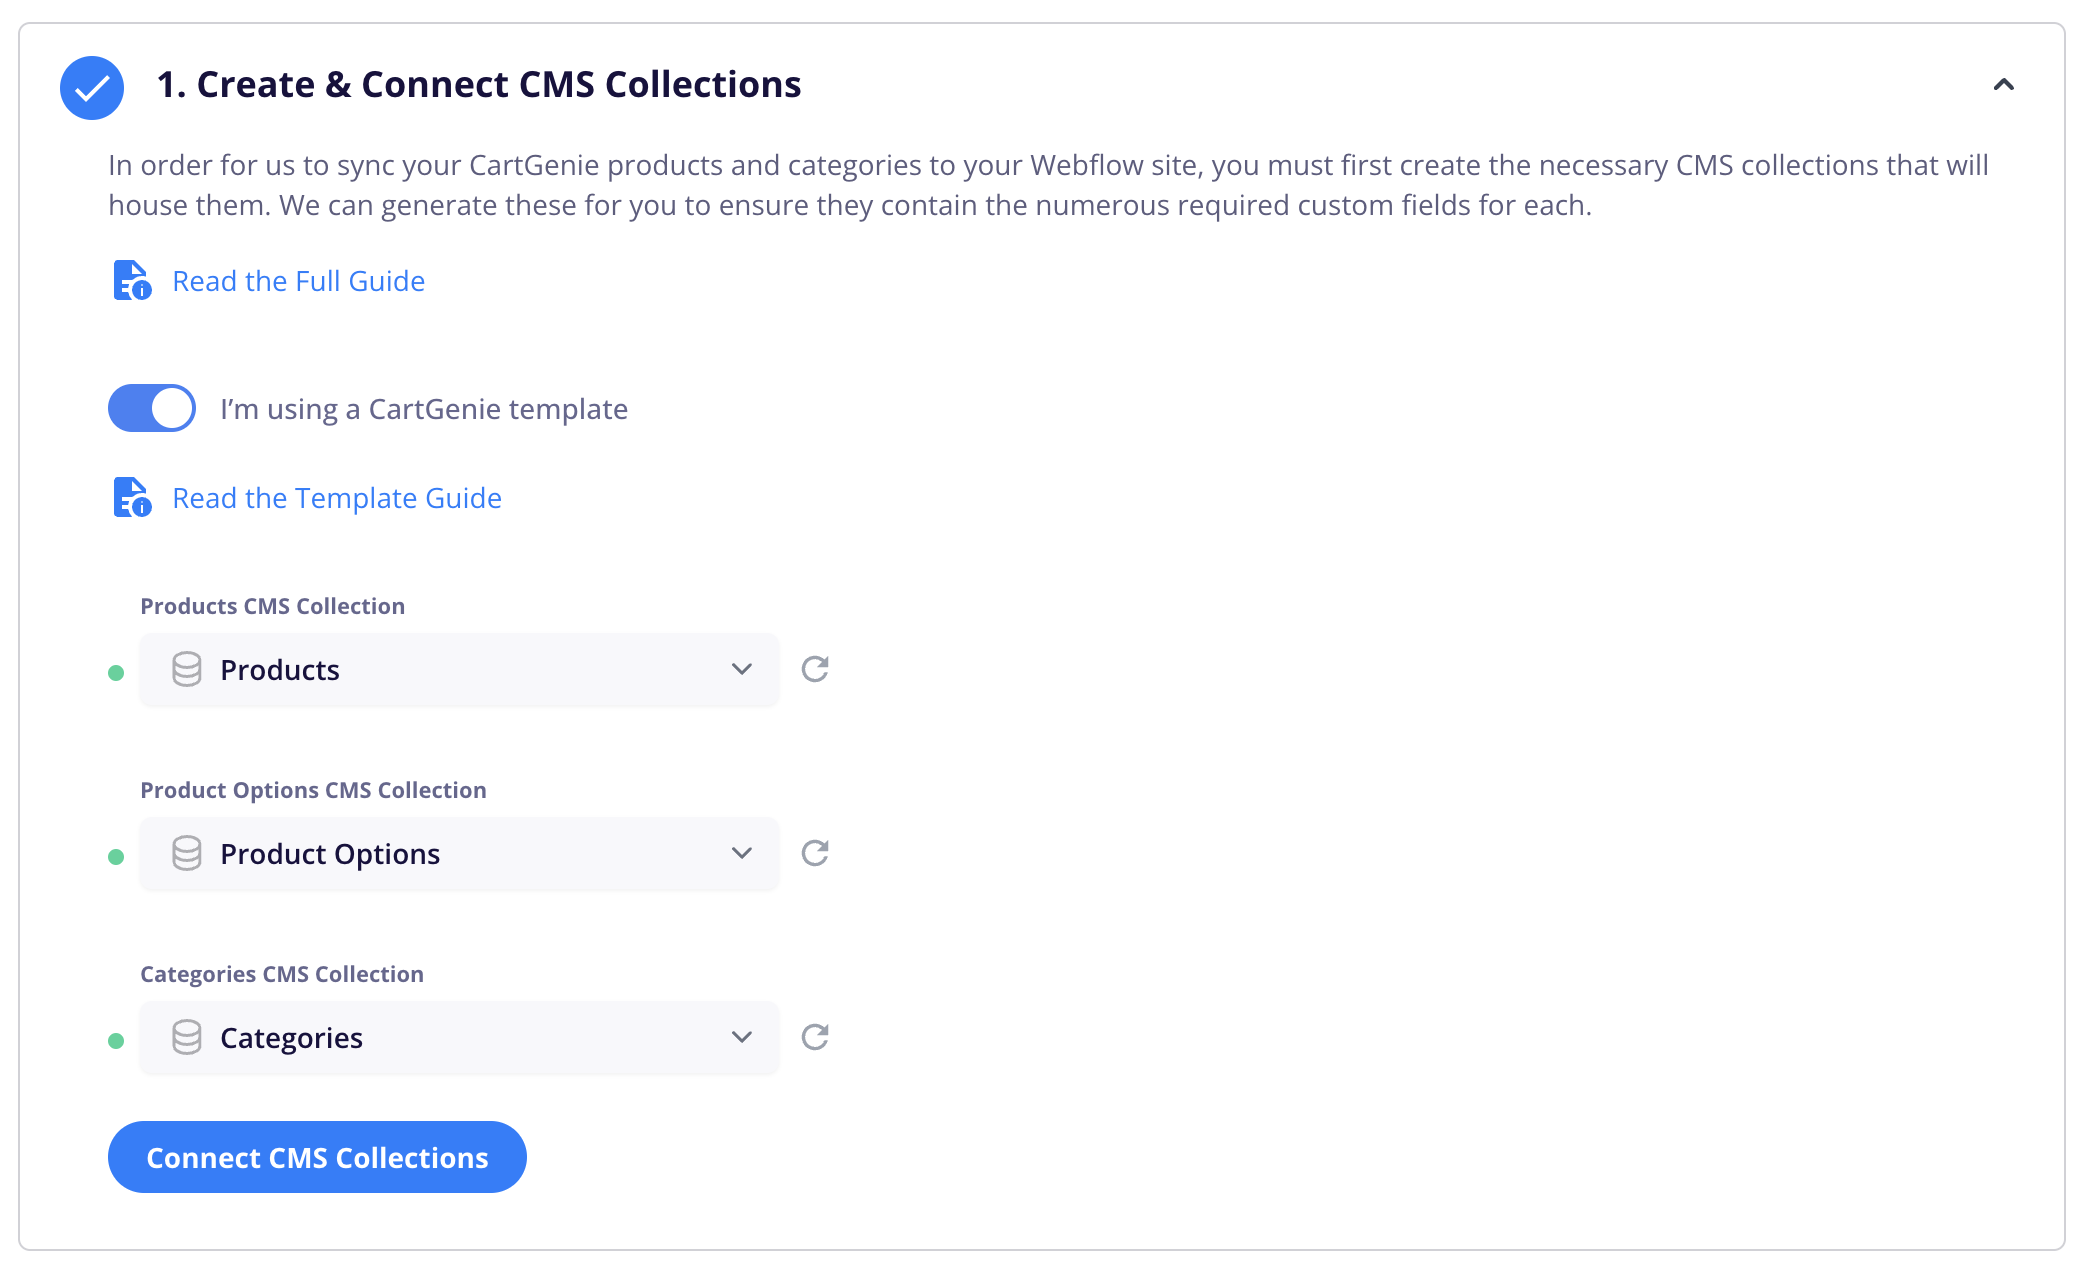
Go to Setup GuideOn Step 1, be sure to select the “I’m using a CartGenie template” toggle and connect the CMS collections from the template.
On Step 4, also use the toggle to select the pre-created Checkout and Confirmation pages. You don’t need to do anything else on this step as we already connected the blocks to the relevant fields, etc.
Once you’ve completed all the setup steps, you’re ready to go live!
Publish your Webflow site and start sharing it with your customers. If you have any questions, feel free to start a chat with us using the bubble in the bottom right corner.
Or, check out our help doc library to answer any questions you may have.
Help Doc Library
