CartGenie makes it easy to add in a gallery of thumbnails underneath your main product images.
Here’s how…
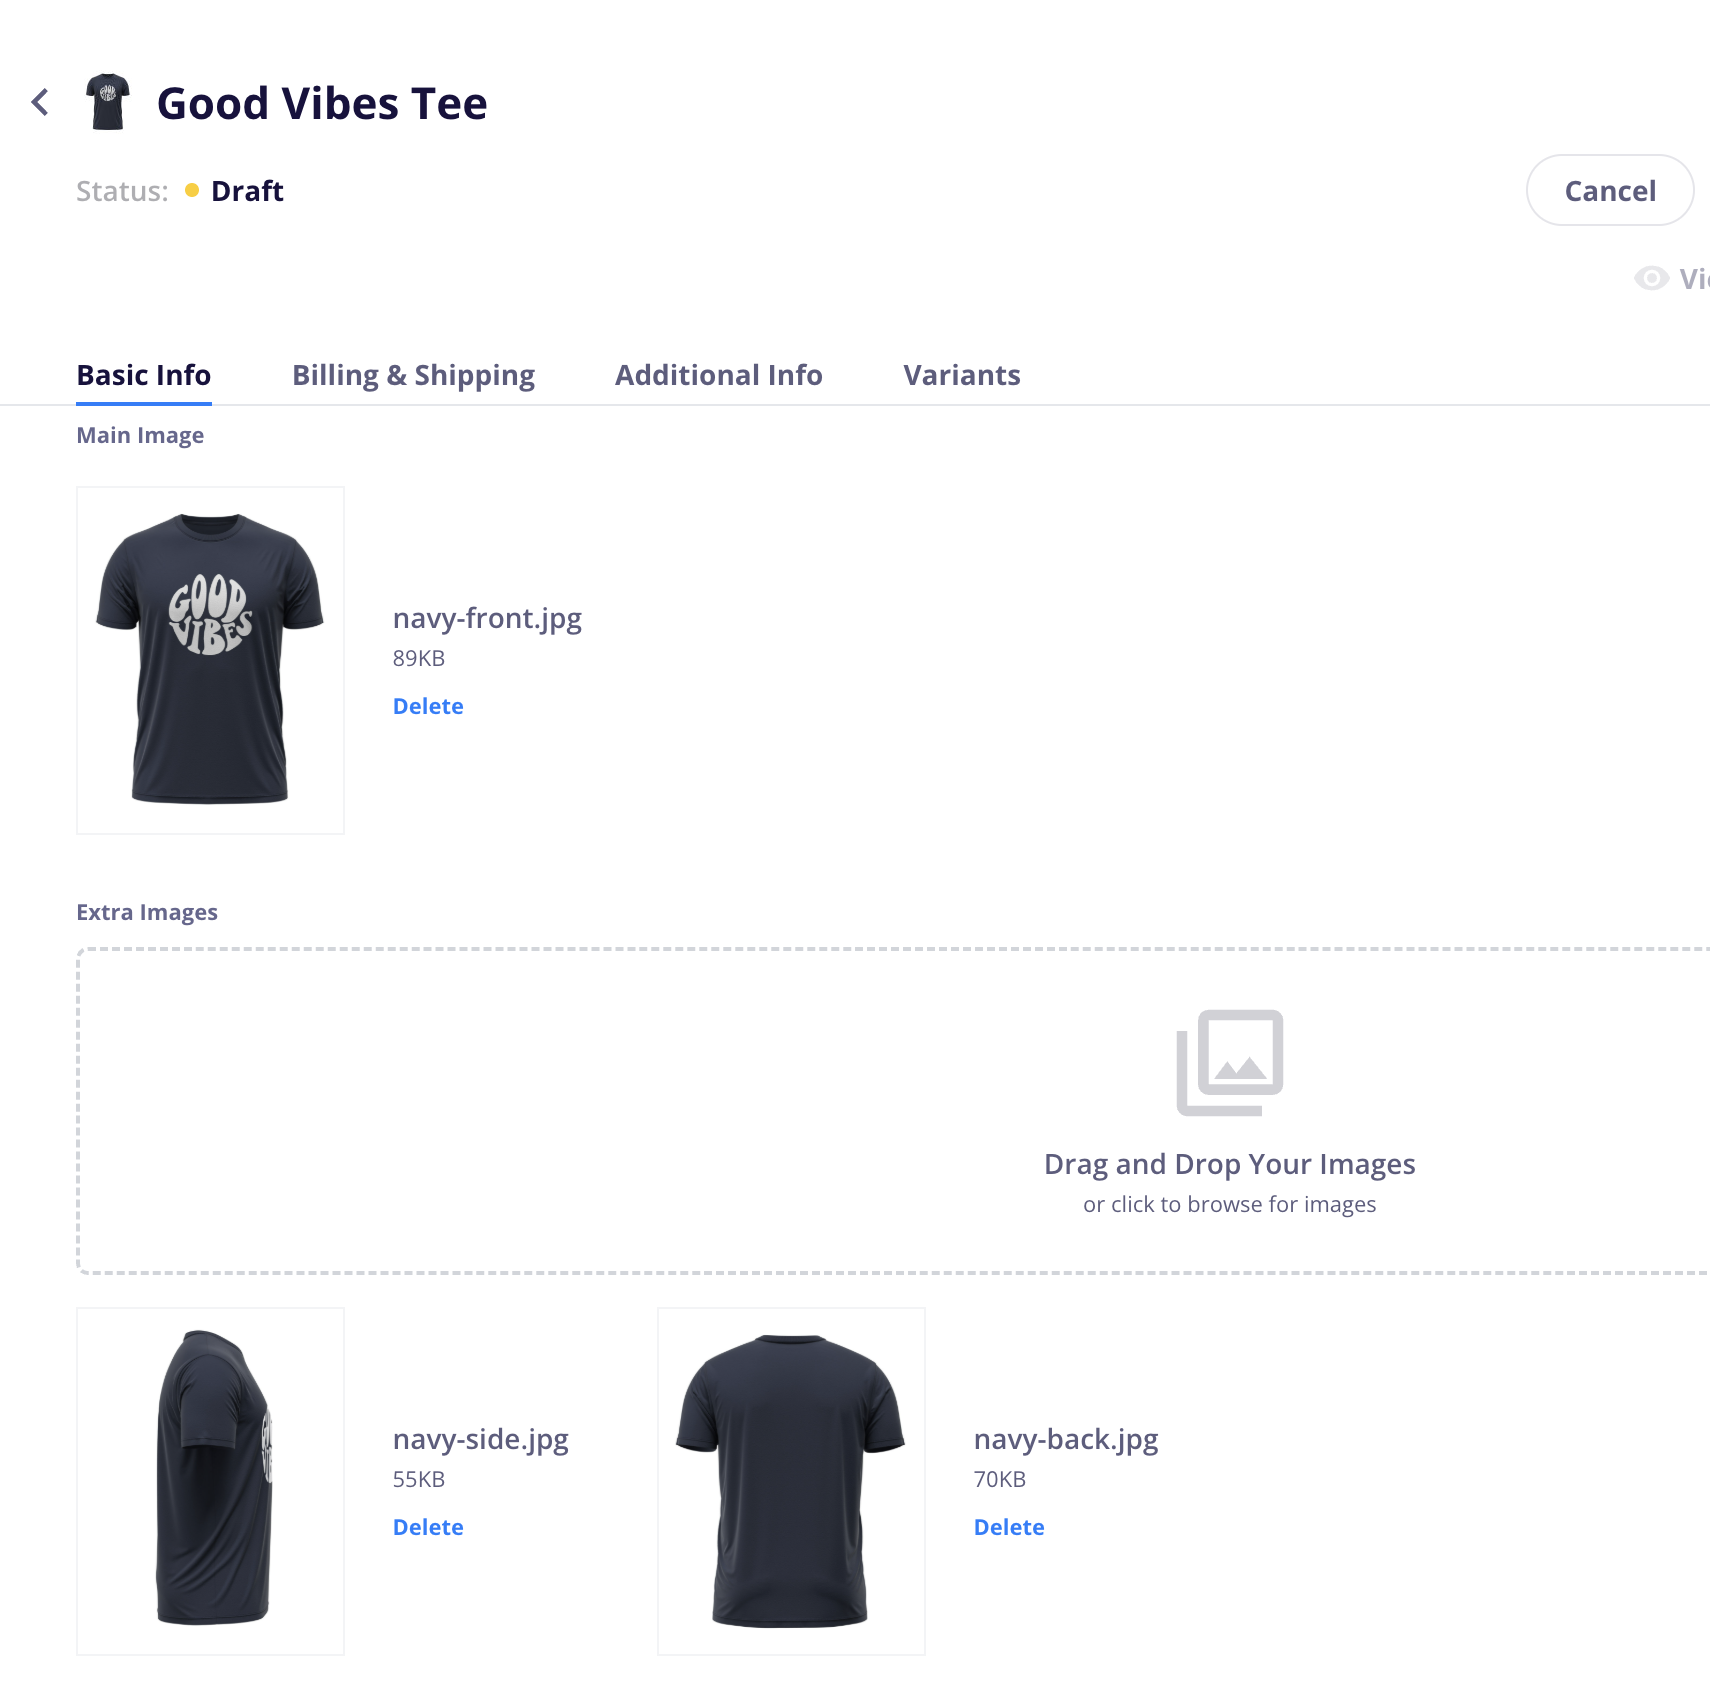
In your CartGenie products, upload images to the “Extra Images” section in the Basic Info tab.
You can also add gallery images to a product’s variants as well to have them displayed on the product page.


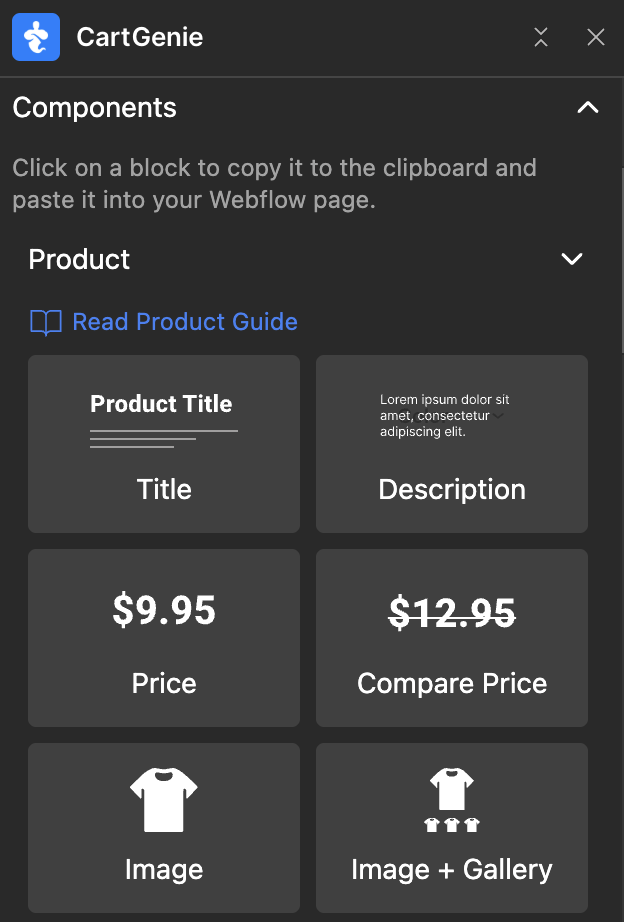
In Webflow, click on the App tab in the left menu and select “CartGenie.” Then go to Create Product Pages > Components > Product section.
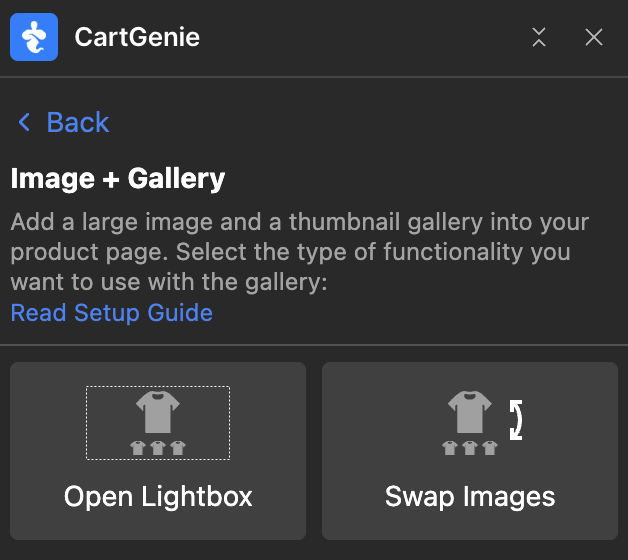
Click on the “Image + Gallery”. This will open up 2 options.
Select your preference of either:
Open Lightbox
If the main image or a thumbnail is clicked on your site, Webflow’s native lightbox will open in an overlay to display your images in a beautiful dark gallery.
Swap Images
If a thumbnail is clicked, it will immediately take the place of the main large image.
Note: When using this method, we recommend adding your primary image to the “extra images” slot as well in CartGenie so it can be selected again.
Then go into your Products template page.
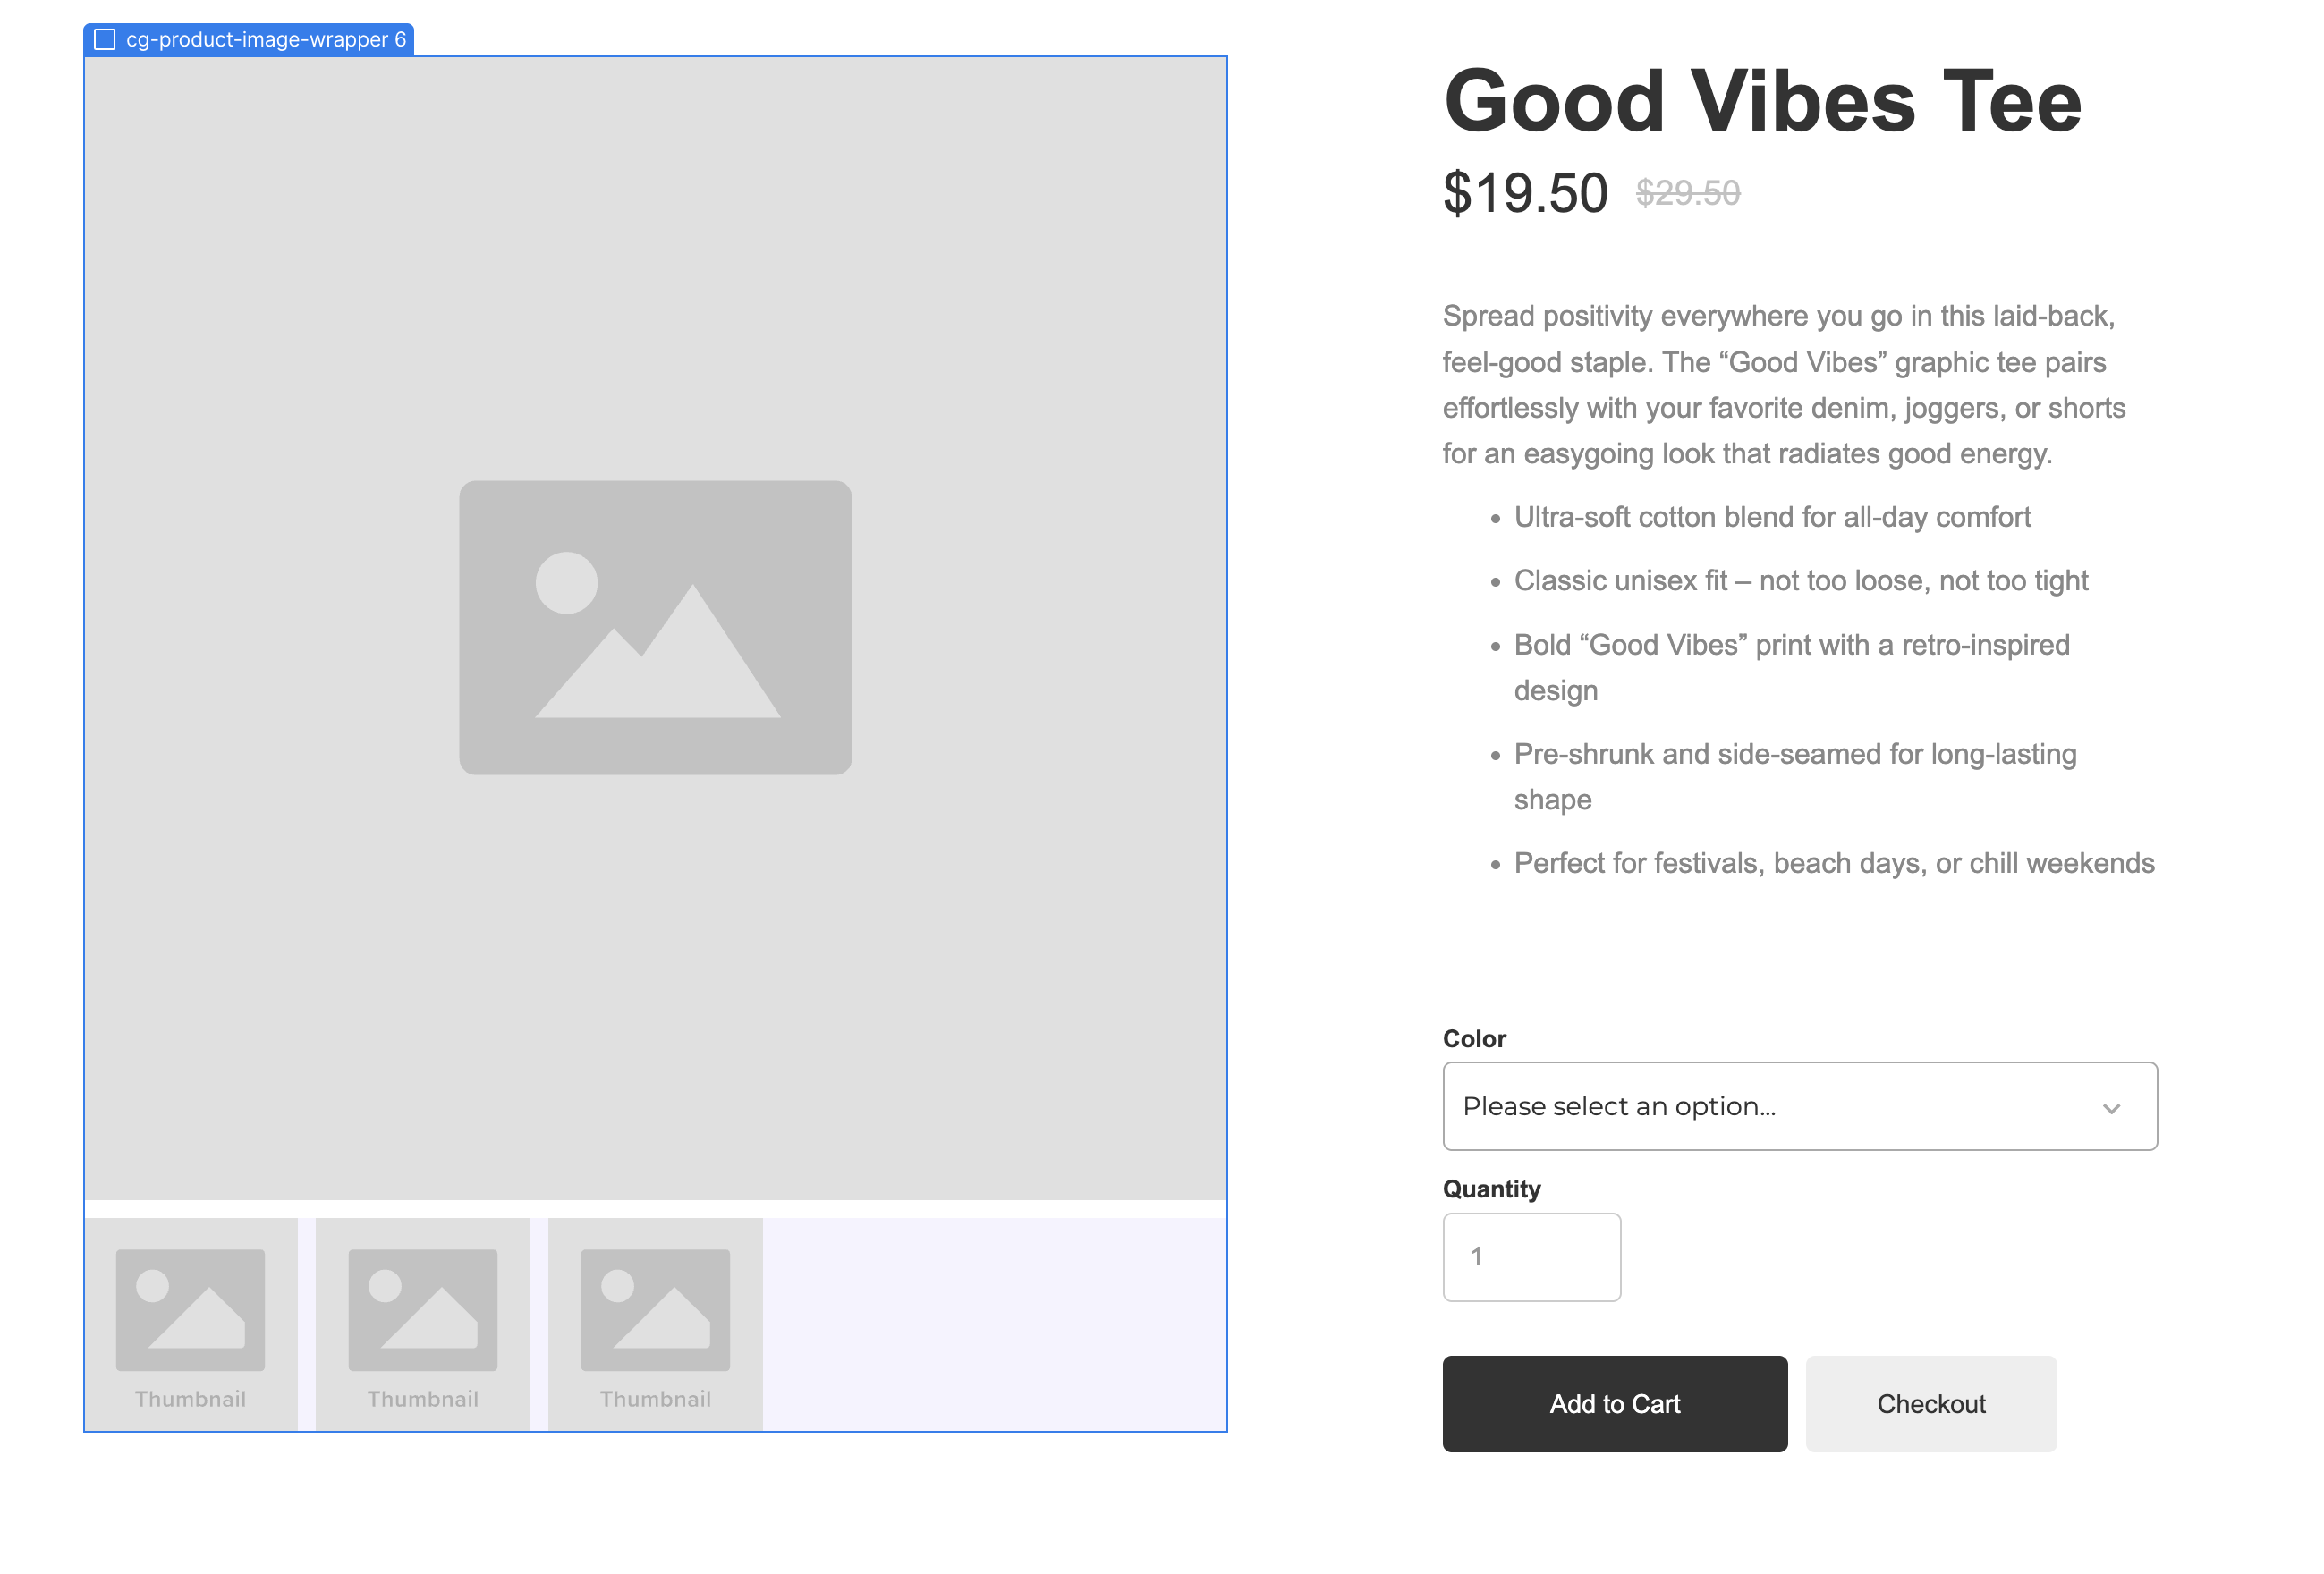
Delete the existing “cg-product-image-wrapper” and paste in your new block. It should look something like this:
For the swap image version instructions, click here (skip this section if you’re using the swap image version)
Now, select each element below and connect it to the corresponding fields:
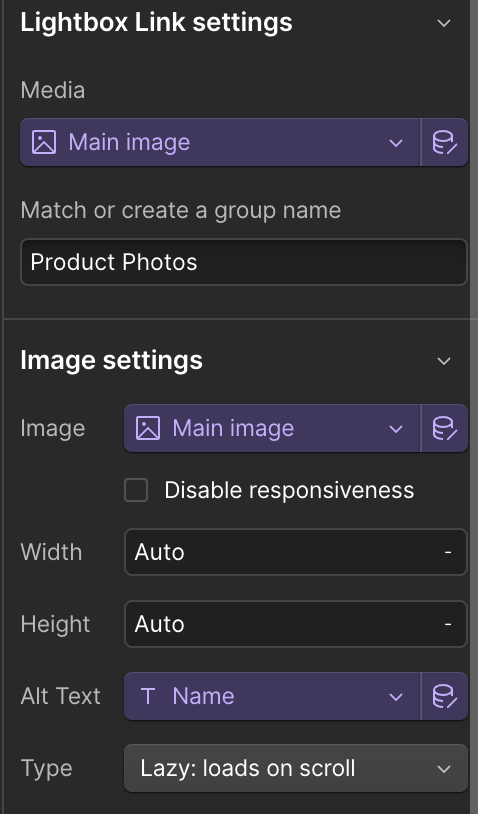
In the layer settings panel on the right sidebar, connect:
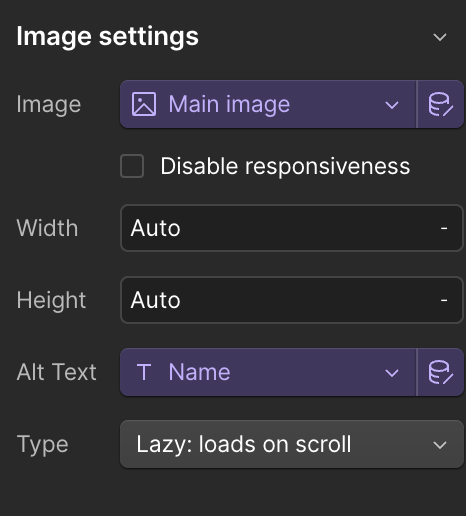
Lightbox Media → Main Image
Image → Main Image
Alt Text (optional) → Name
(Do not change the Group Name or else this will disconnect the lightbox)
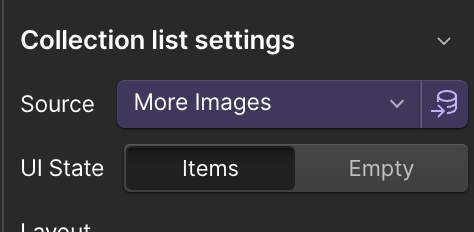
In the layer settings panel on the right sidebar, connect:
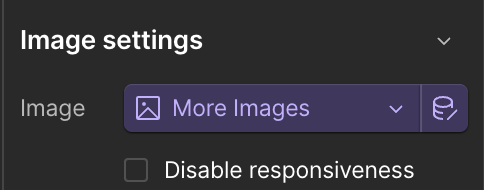
Source → More Images
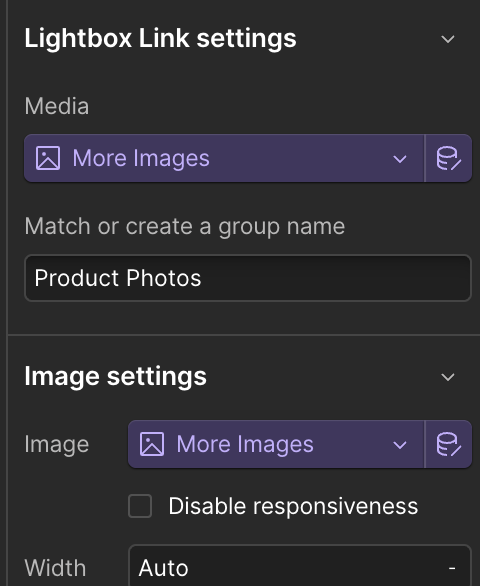
In the layer settings panel on the right sidebar, connect:
Lightbox Media → More Images
Image → More Images
(Do not change the Group Name or else this will disconnect the lightbox)
That’s it!
For the lightbox version instructions, click here (skip this section if you’re using the lightbox)
Now, select each element below and connect it to the corresponding fields:
In the layer settings panel on the right sidebar, connect:
Image → Main Image
Alt Text (optional) → Name
In the layer settings panel on the right sidebar, connect:
Source → More Images

In the layer settings panel on the right sidebar, connect:
Image → More Images
That’s it!
Save and publish your Webflow site.
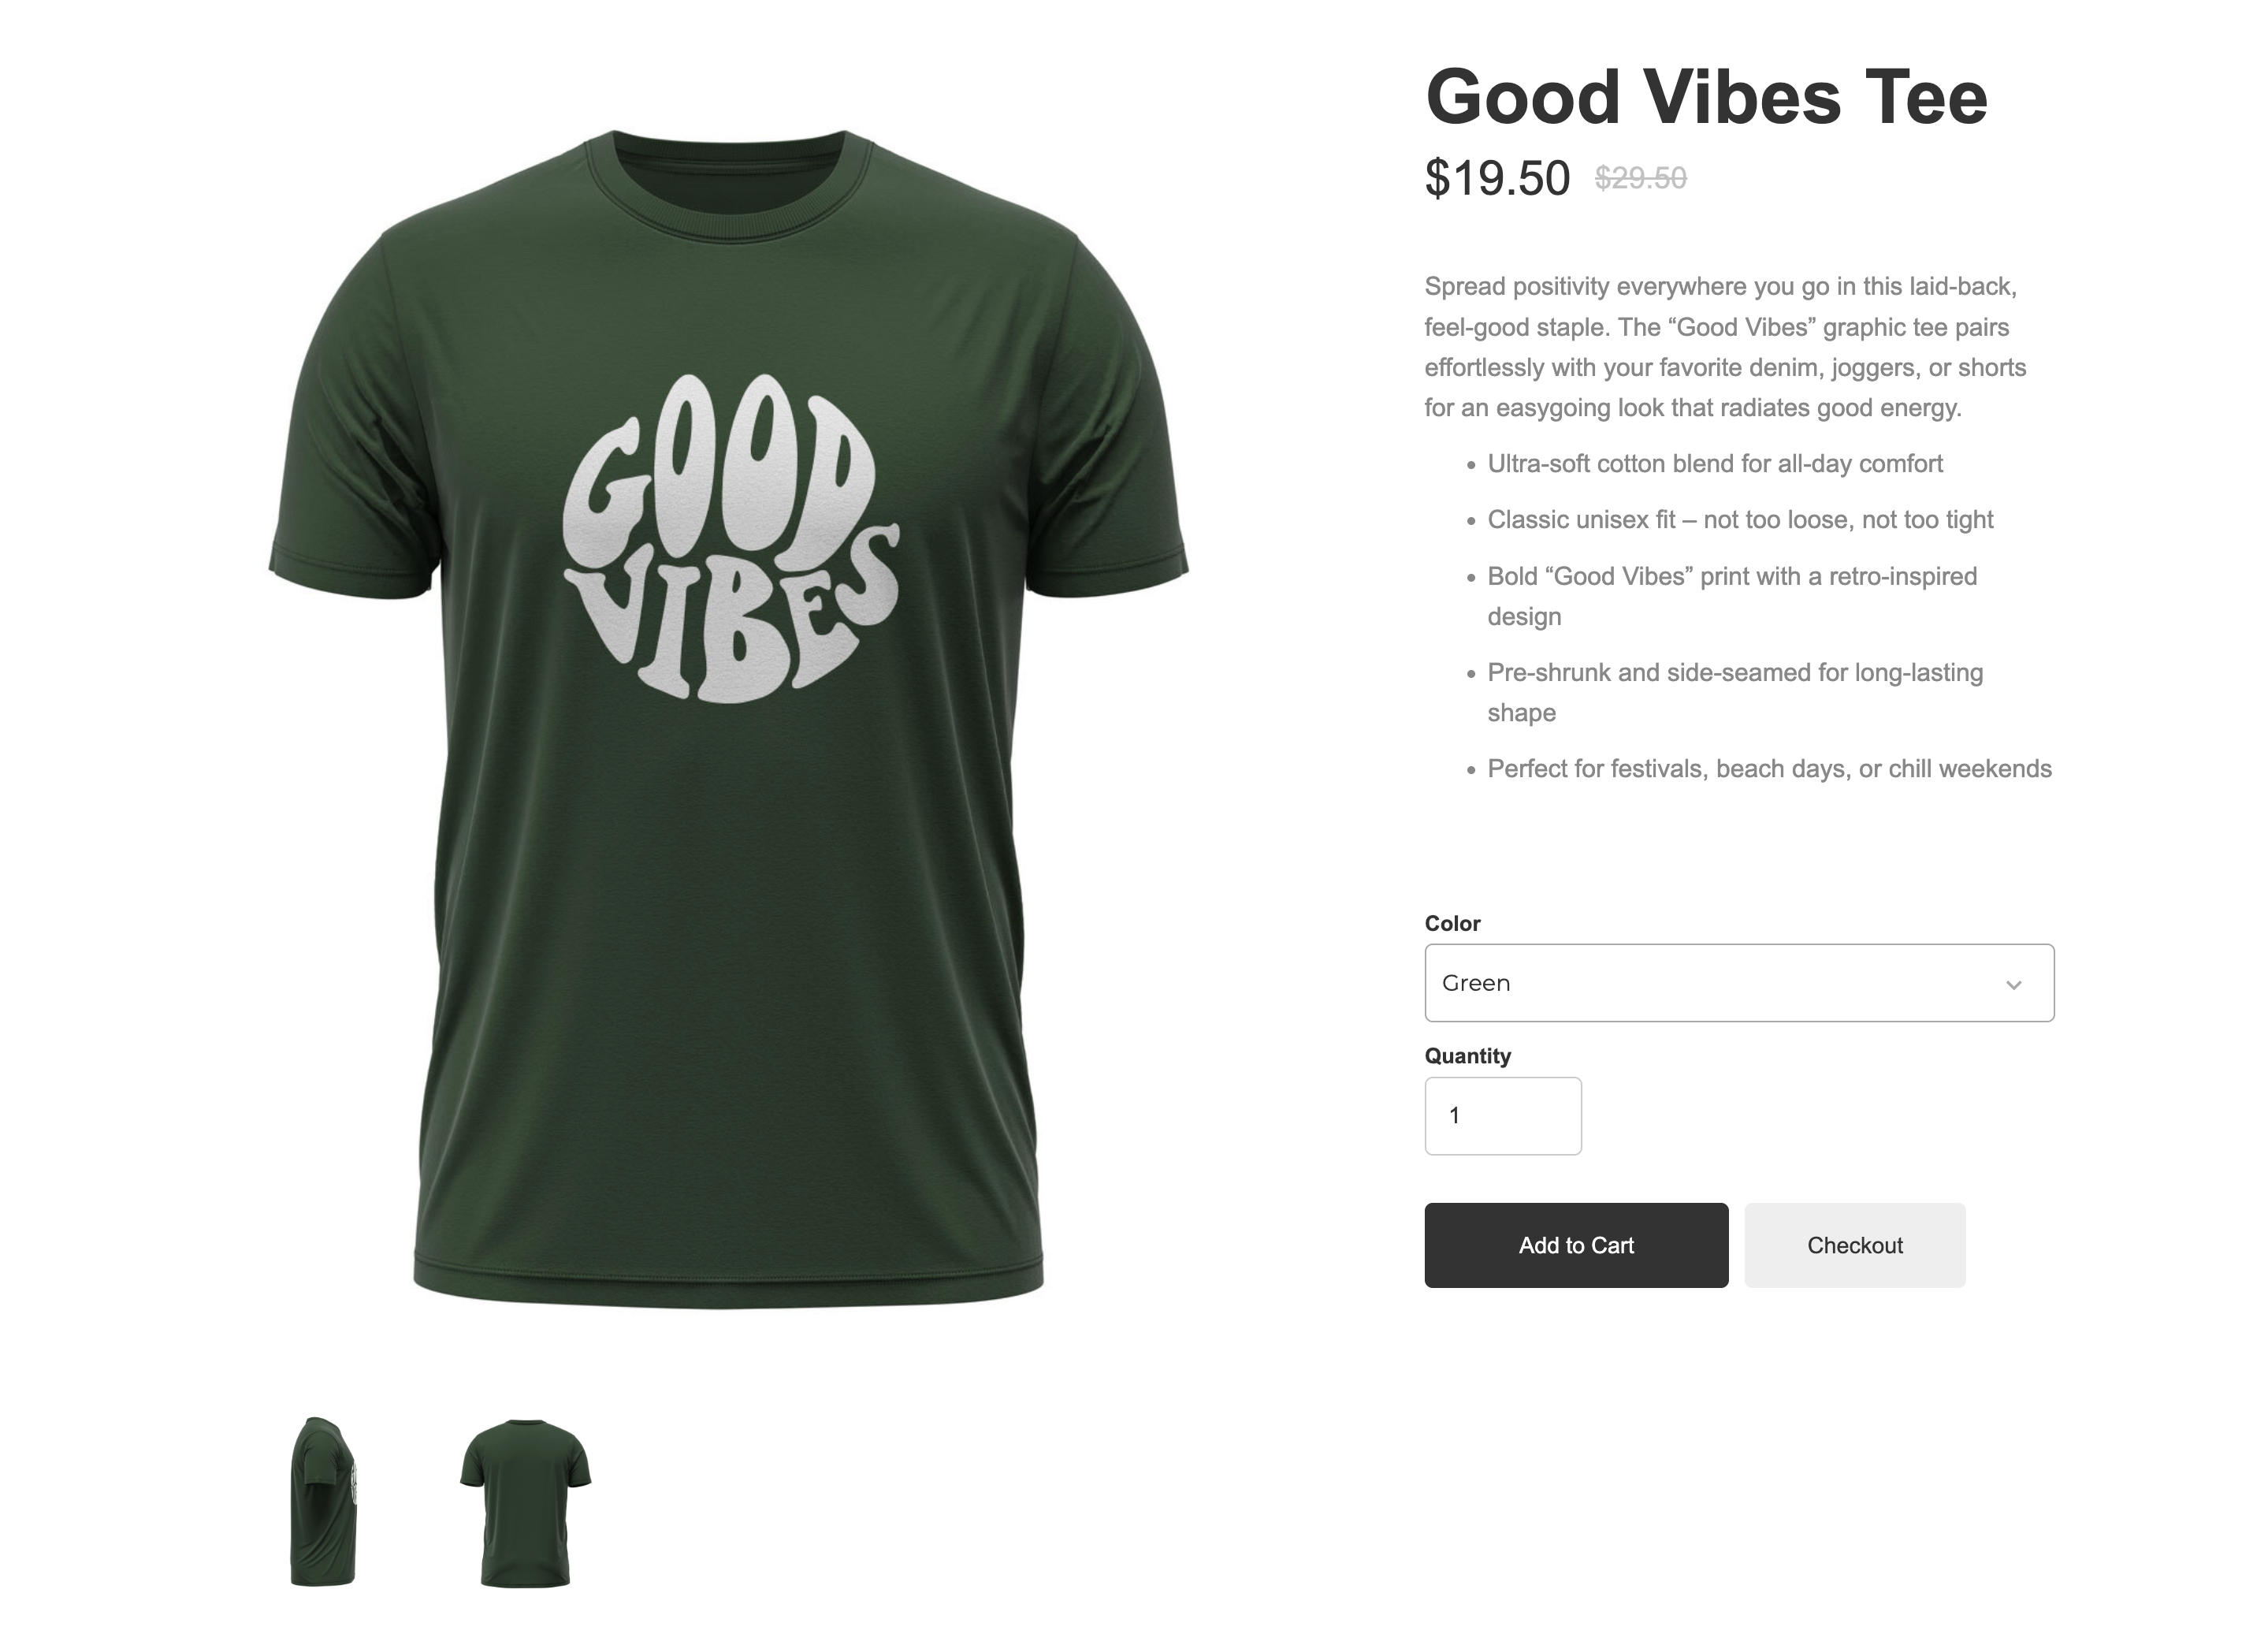
Your product page should now pull in the thumbnail image gallery beneath your primary product image.

If you click on the main image or one of the thumbnails, a lightbox will popup and display all of your product images together in a professional display.
(Or the images will just swap if that is the method you chose.)

If you select a different variant on the product page which has its own main image and extra images gallery, it will switch out all of the images on the page.