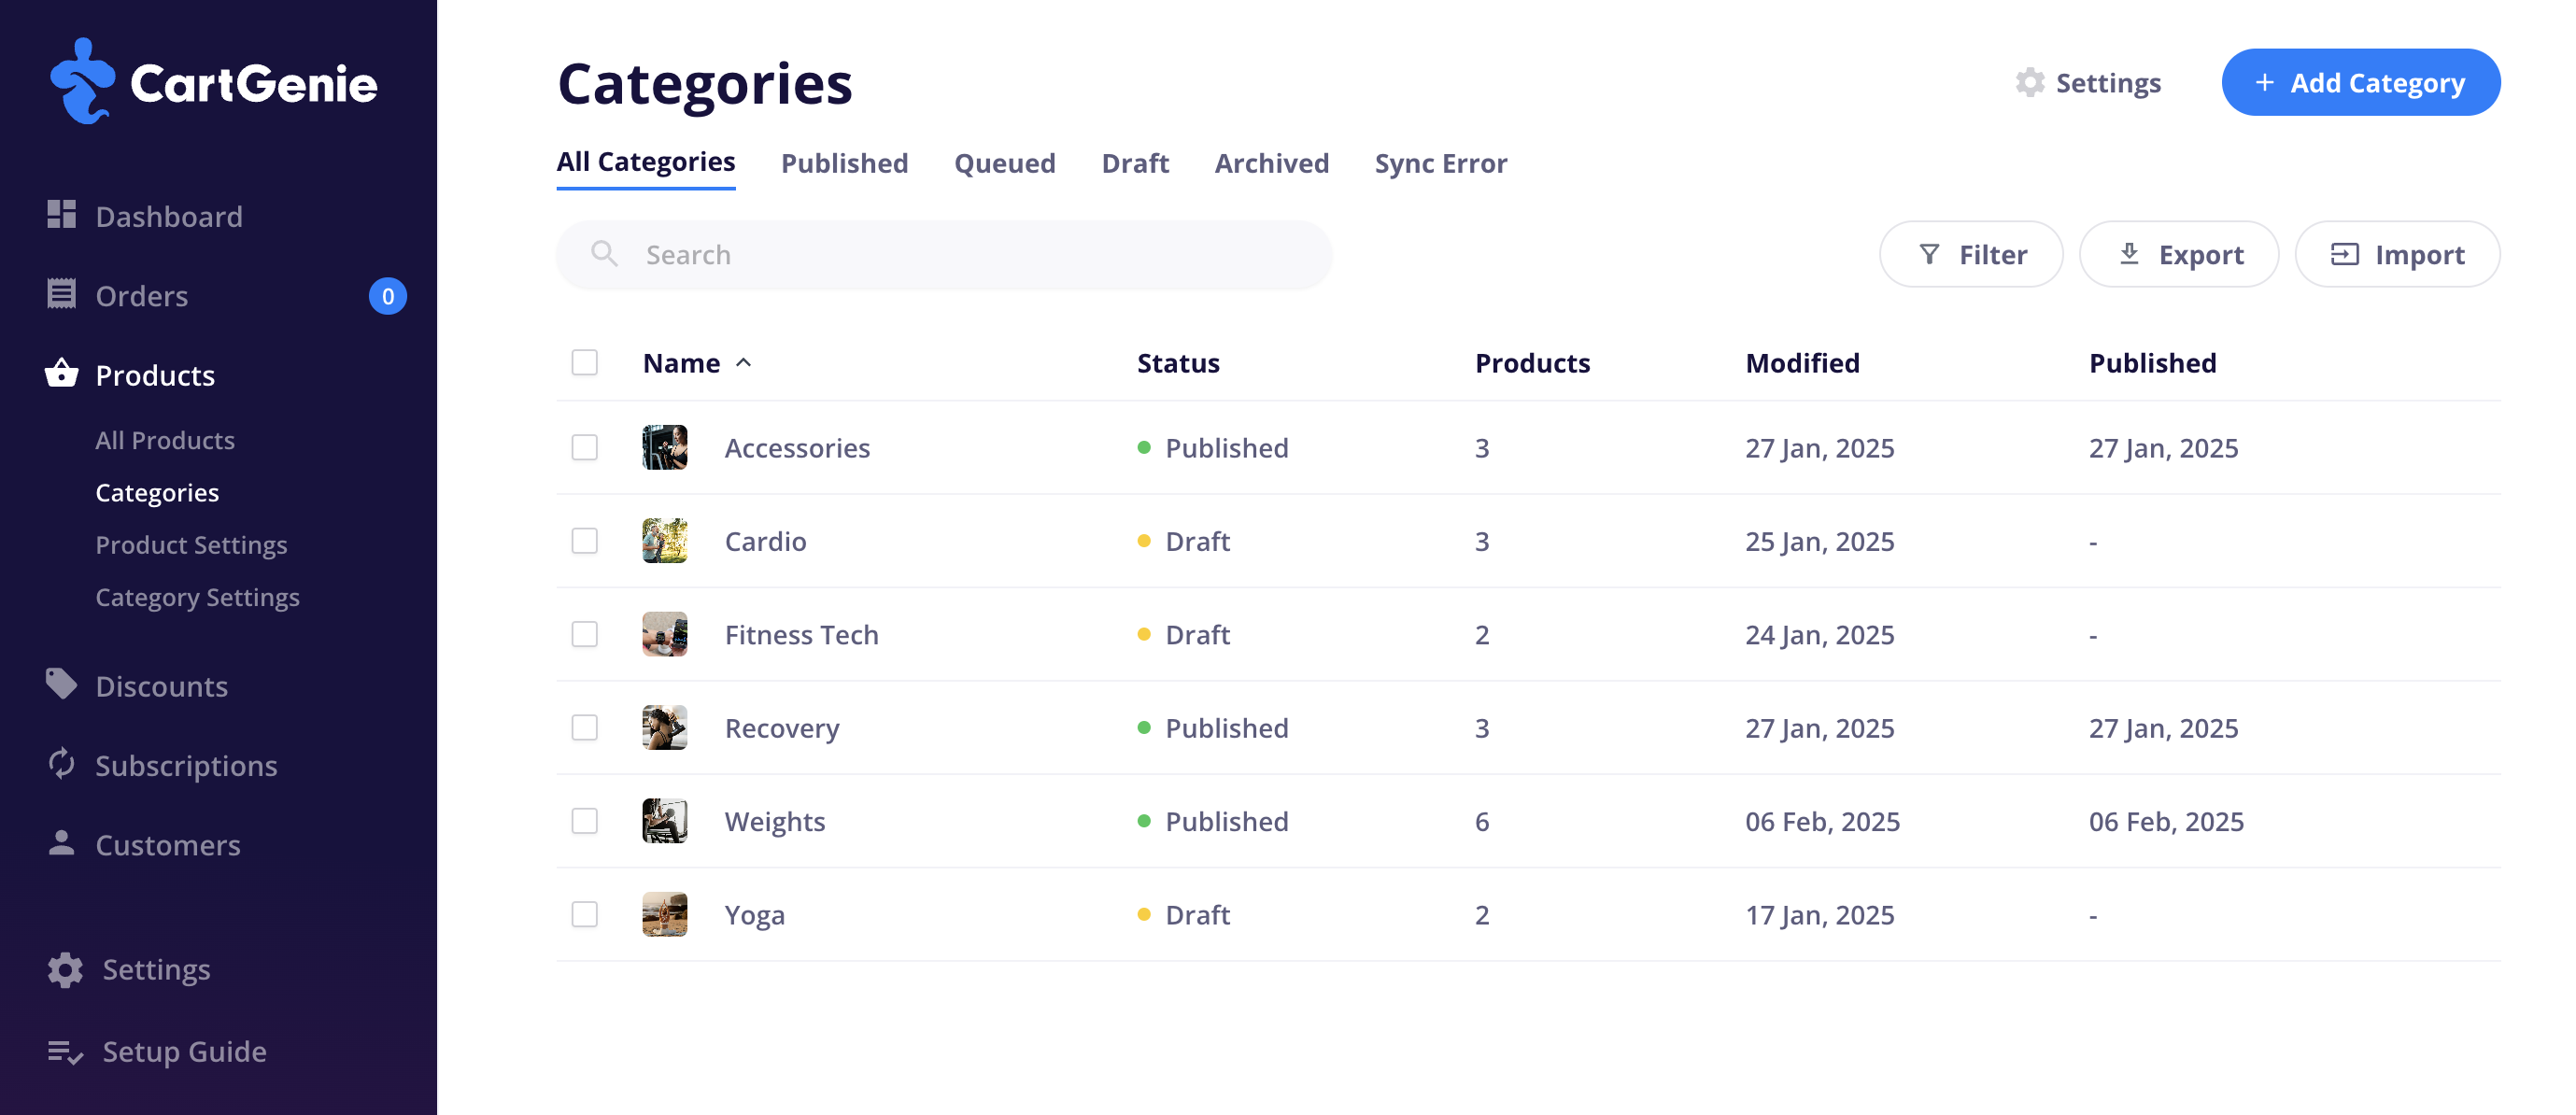
Product categories allows you to group your products into different classifications to better organize & display them on your site or to apply certain rules (such as restrictions on discounts, etc.).
The same product can be added to multiple categories so that you can use them flexibly. (Ex: You could have a “Shirts” and “Pants” category as well as a “Men” and “Women” category to organize your products.
Categories are added to your site as a CMS collection and will contain a multi-reference field containing all products within them so you can easily add a “Collection List” block to display them anywhere on your site.
In CartGenie, go to the Products > Categories subpage.
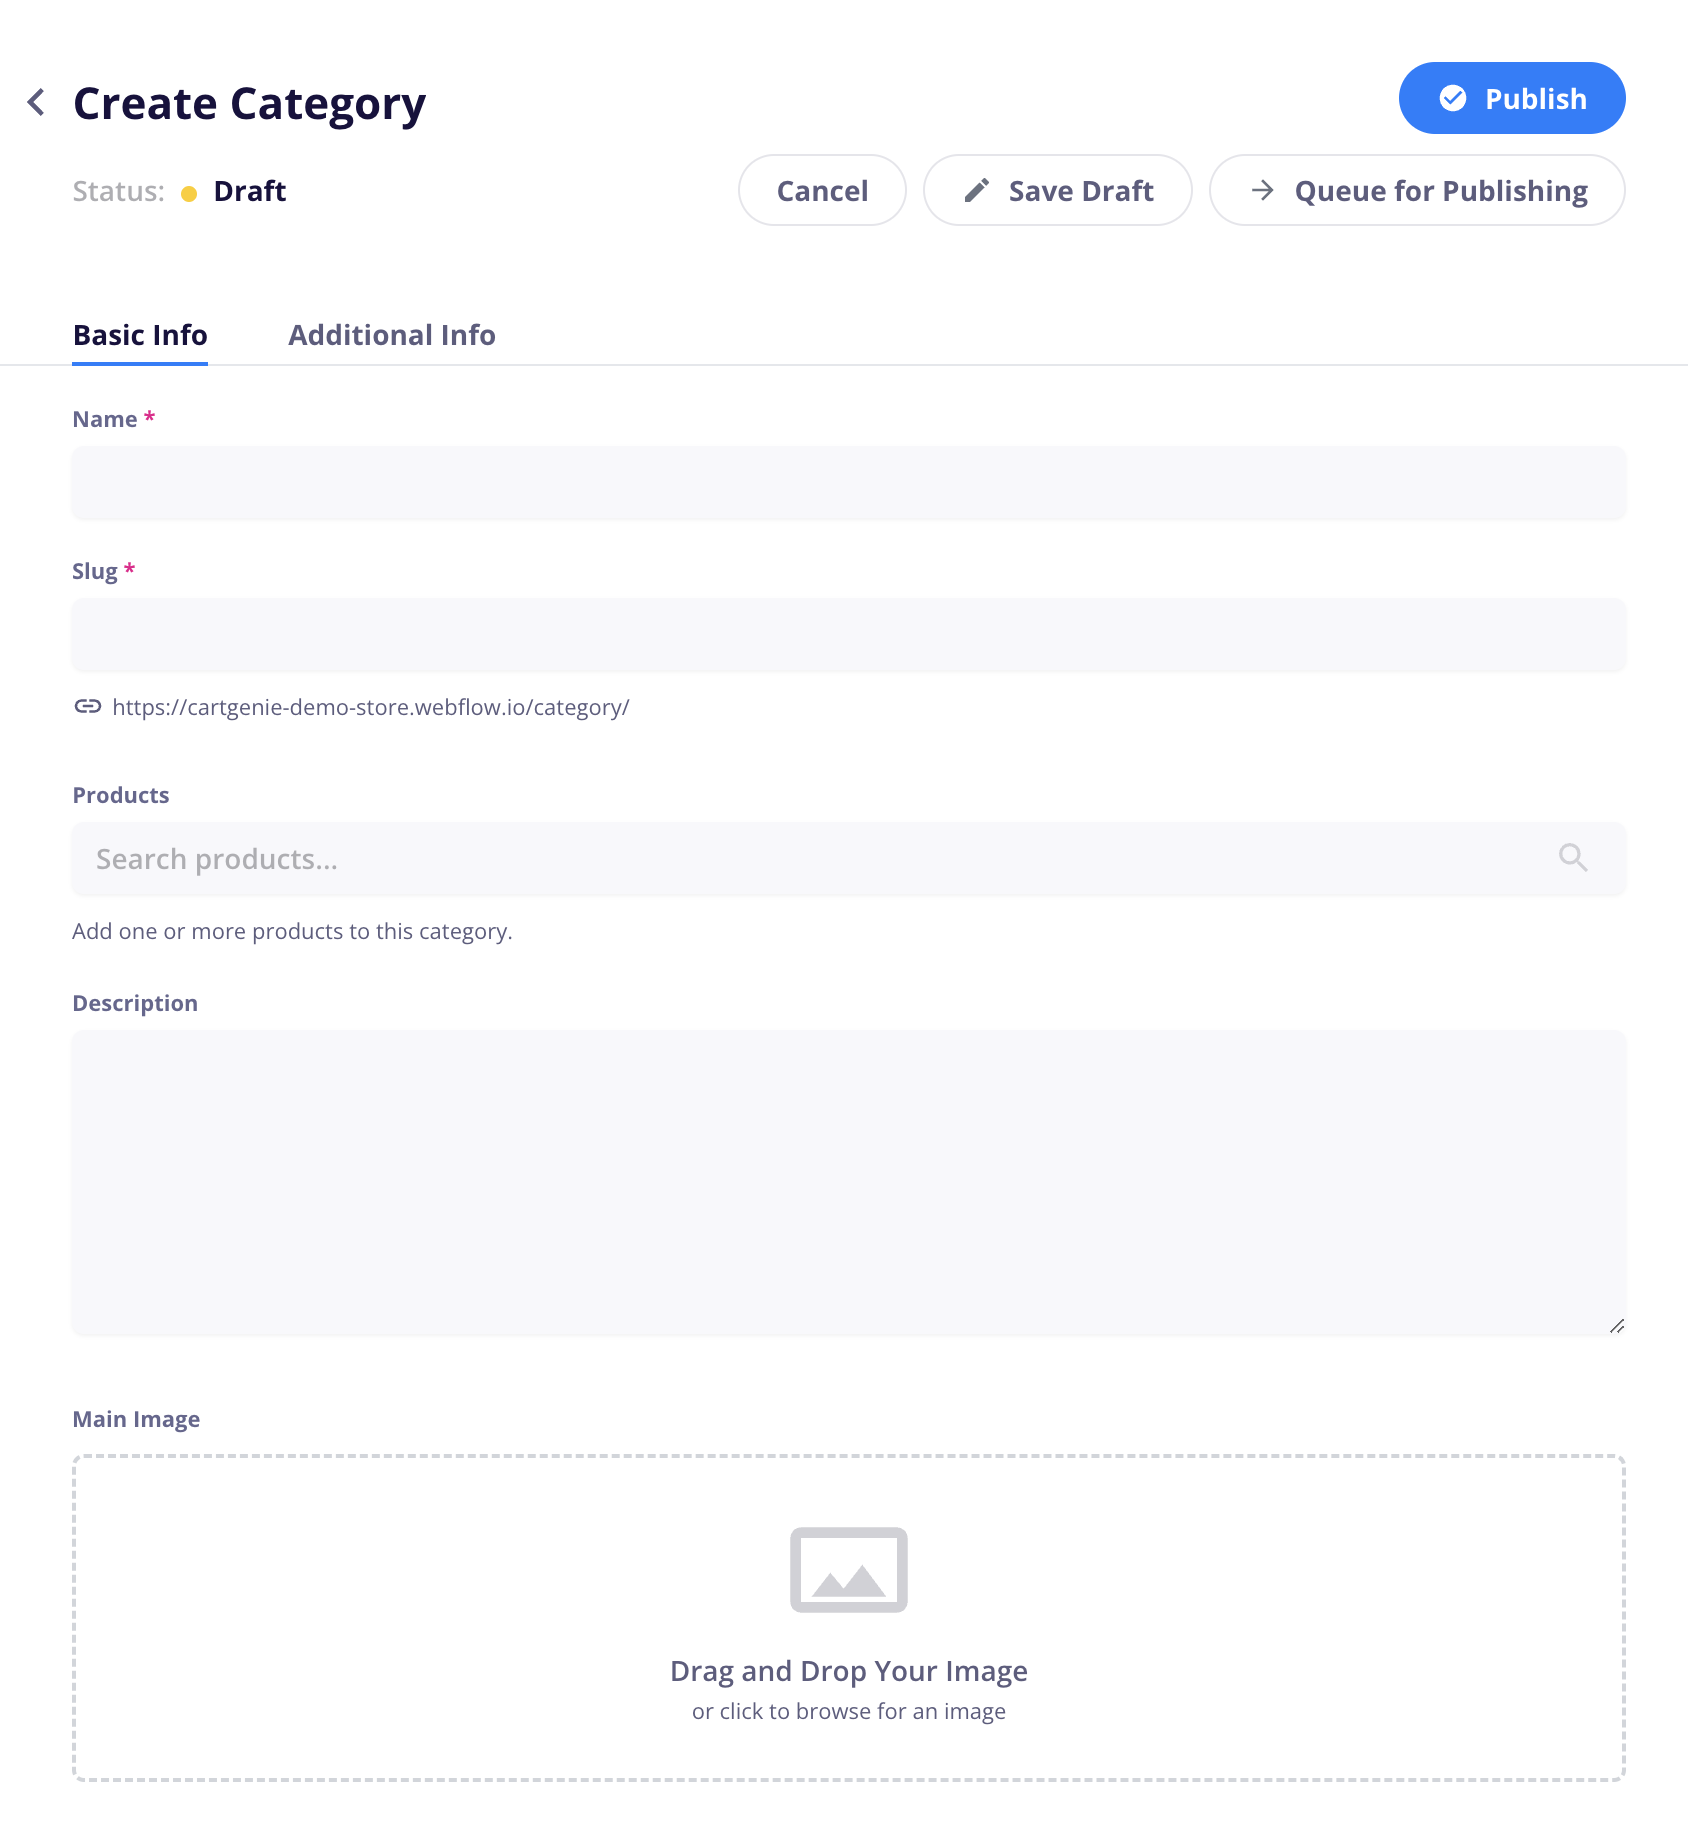
Click the “Add Category” button in the top right corner.
Name
This is the customer facing name of your category
Ex: “Shirts”
Slug
This is the URL slug for your category
Ex: store.com/category/shirts
Products
These are the products that are in this category. You can add them here in the category page or individually when editing a product.
Description (optional)
A customer facing description of your product category.
This will be added to the CMS collection as a text field and can be used to build a category page on your site.
Main Image (optional)
An image to represent your product category.
This will be added to the CMS collection as an an image field and can be used to build a category page on your site.
If you would like to add additional CMS fields that can be used in the category template page when designing in Webflow, you can create those fields in the Category Settings page.
You can also create a category directly inside the product detail panel. This is super convenient when you’re in the process of creating a product, but hadn’t yet created the category it belongs in.
Find the Categories field in the Product detail panel and click the "+Add Category” link to the top right of the field.
This will display a popup for you to enter the desired Category Name and Slug.


