If you're running any kind of marketing — ads, email campaigns, SEO, social media — connecting GA4 to CartGenie lets you understand what's actually driving revenue.
GA4's Purchase Journey report shows you how many visitors go from adding items to their cart through to completing a purchase, and where they drop off. This helps you identify friction points in your checkout flow. When purchase events flow into GA4, you can tie revenue back to specific traffic sources. You'll know whether your Google Ads, Instagram posts, or email campaigns are actually generating sales — not just clicks.
Once connected, CartGenie sends the following GA4 ecommerce events automatically. Each event contains the necessary information such as product name, price, quantity, etc.
Fires when a customer views an individual product page on your site.
Fires when a customer adds a product to their cart. In GA4, this populates the “add_to_cart” event and feeds into reports like the Ecommerce Purchases report and the Purchase Journey funnel.
Fires when a customer removes an item from their cart. Useful for understanding which products get second-guessed.
Fires when the customer initiates checkout (goes to checkout page) after adding an item to the cart
Fires the first time the shipping address is completed / checked for validation (regardless of whether it passes or not). This event is not fired if all items are not shippable.
Fired when a customer successfully completes an order. This event includes the transaction ID, order total, currency, tax, shipping cost, and a full breakdown of the items purchased (including product name, variant, price, and quantity for each). In GA4, this populates the “purchase” event and drives your core revenue and conversion reporting.

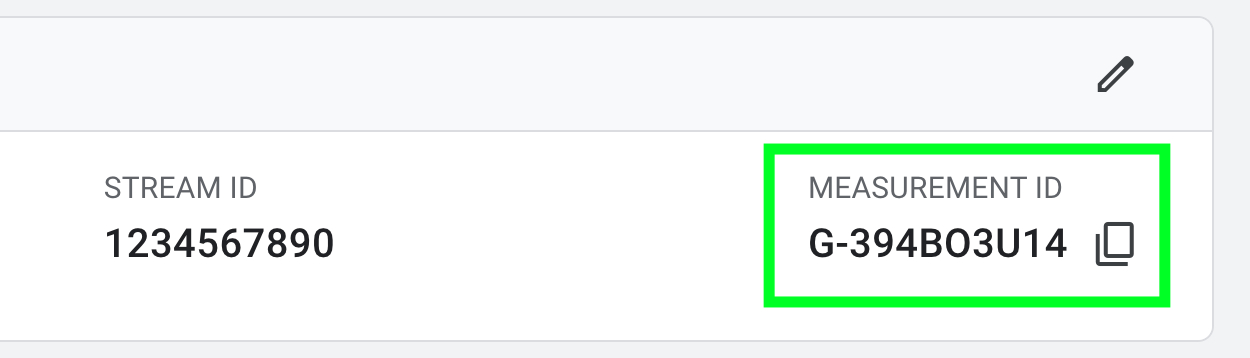
Your Measurement ID is a code that starts with G- followed by a combination of numbers and letters (for example, G-AB1CD2EF3G). It tells Google Analytics which property should receive your store's event data.
To find it:
Sign in to Google Analytics.
Click the Admin gear icon in the bottom-left corner.
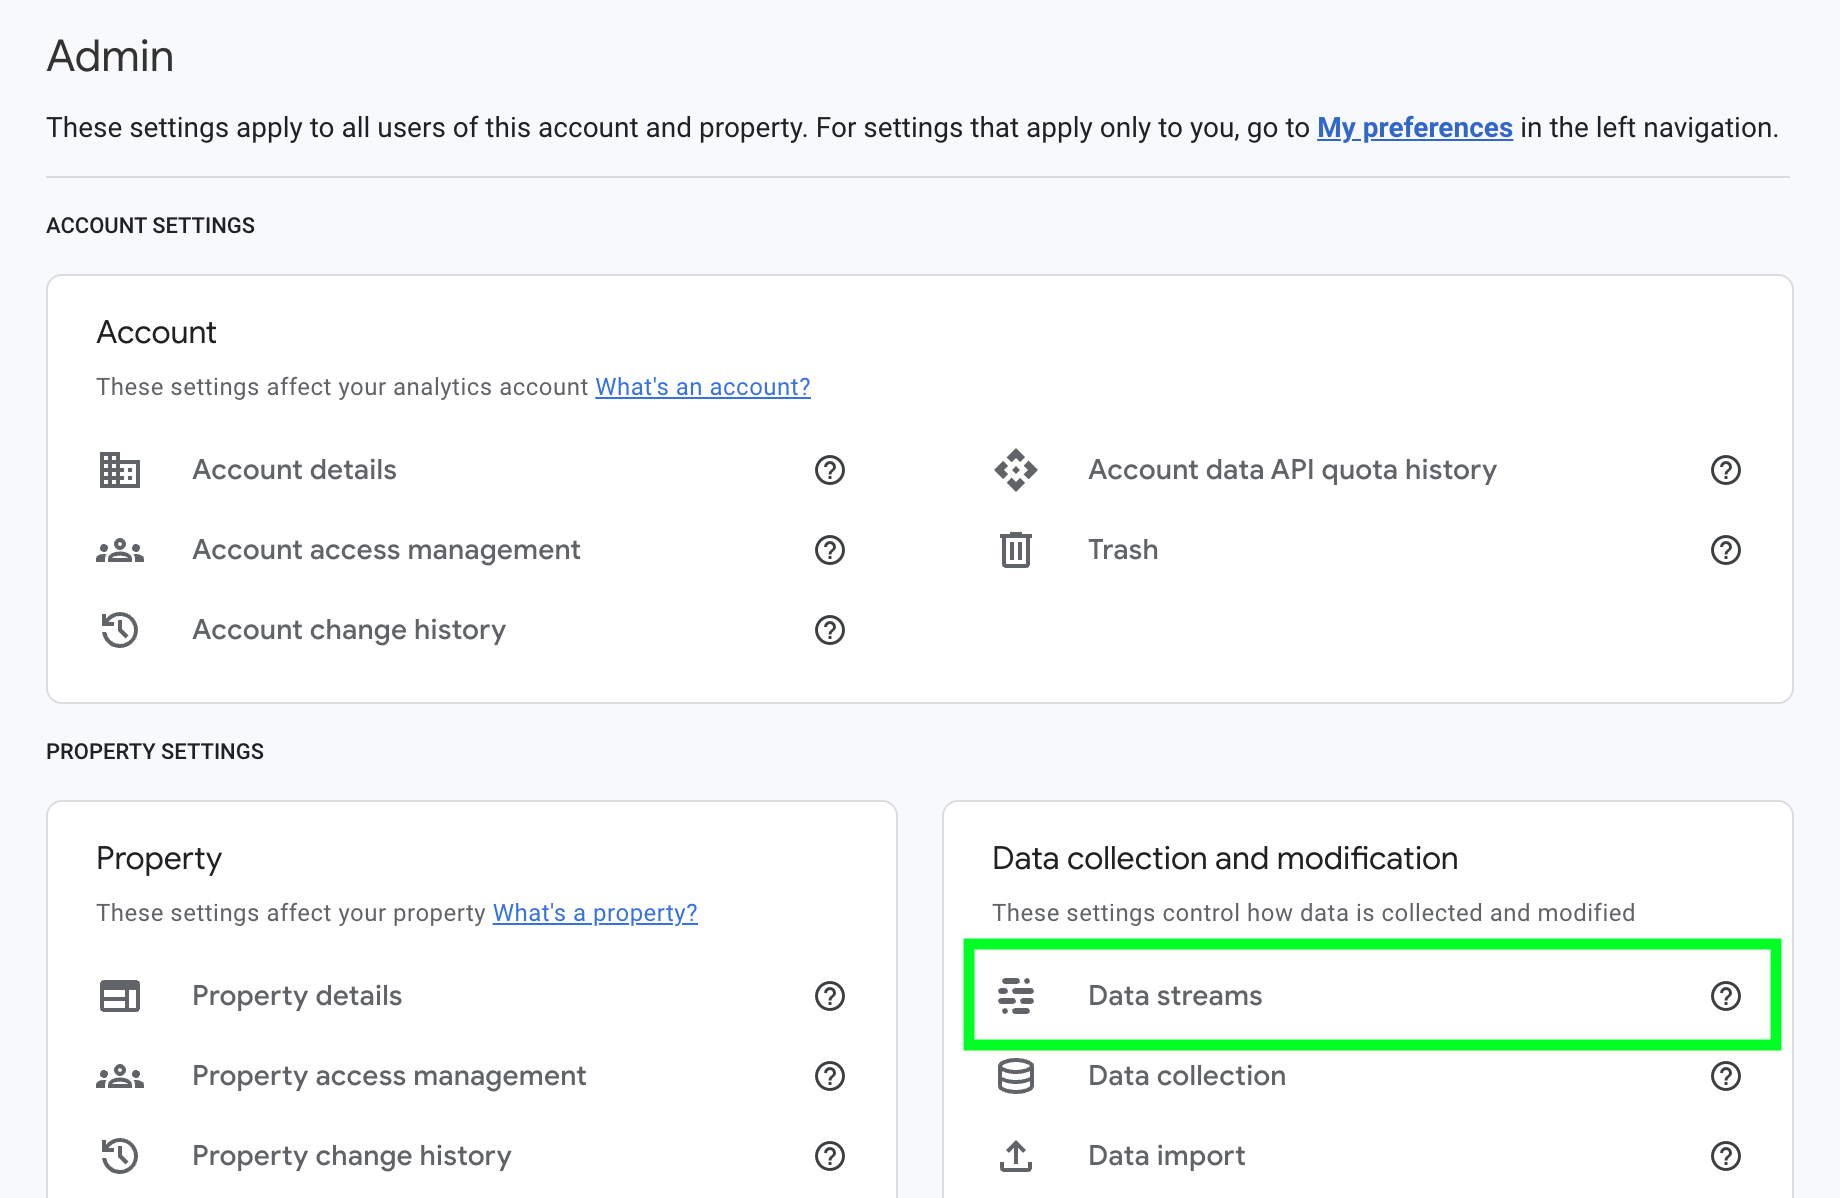
In the Property column, click Data Streams (under "Data collection and modification").
Select your Web data stream. If you don't have one yet, click "Add stream" and follow the prompts to create one for your website.
Your Measurement ID is displayed near the top of the stream details page. Copy it.
Log in to your CartGenie dashboard.
Navigate to Settings → Sales Channels.
Find the Google Settings section.
Paste your GA4 Measurement ID into the field provided.
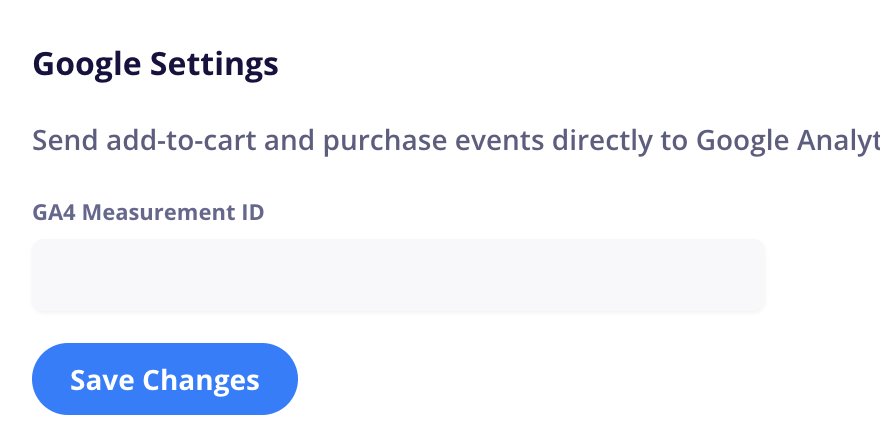
Click Save.
That's it. CartGenie will begin sending add_to_cart and purchase events to your GA4 property automatically.
After saving your Measurement ID, add an item to cart or place a test order to confirm events are flowing correctly:
In Google Analytics, go to Reports → Realtime Overview.
Place a test order on your CartGenie store (you can use CartGenie's test mode).
You should see the add_to_cart and purchase events appear in the Realtime report within a few seconds.
Note that it can take 24–48 hours for event data to appear in standard GA4 reports and explorations. The Realtime report is the fastest way to confirm your setup is working.
Do I need Google Tag Manager? No. CartGenie sends events directly to GA4 — no GTM setup, custom tags, or code snippets required.
Will this work with my existing GA4 setup? Yes. CartGenie's events will appear alongside any other events you're already collecting in GA4. They won't interfere with your existing tracking.
I don't have Google Analytics yet. How do I get started? Create a free account at analytics.google.com. Google will walk you through creating a property and a web data stream. Once that's done, grab your Measurement ID and follow the steps above.
What if my events aren't showing up? Double-check that your Measurement ID is entered correctly in the CartGenie dashboard — extra spaces or an incorrect ID are the most common issues. If everything looks right and events still aren't appearing after 48 hours, reach out to us at help.cartgenie.com.
