Welcome to CartGenie! 🧞♂
We’re excited to have you on board.
Setting up your CartGenie account is quick and easy, so you can start selling seamlessly on Webflow in no time. This guide will walk you through the first steps to get your store up and running.
Note: If you’re migrating from Webflow Ecommerce, follow this guide instead.
To get started, go to to the CartGenie sign up page
Create a Free Account
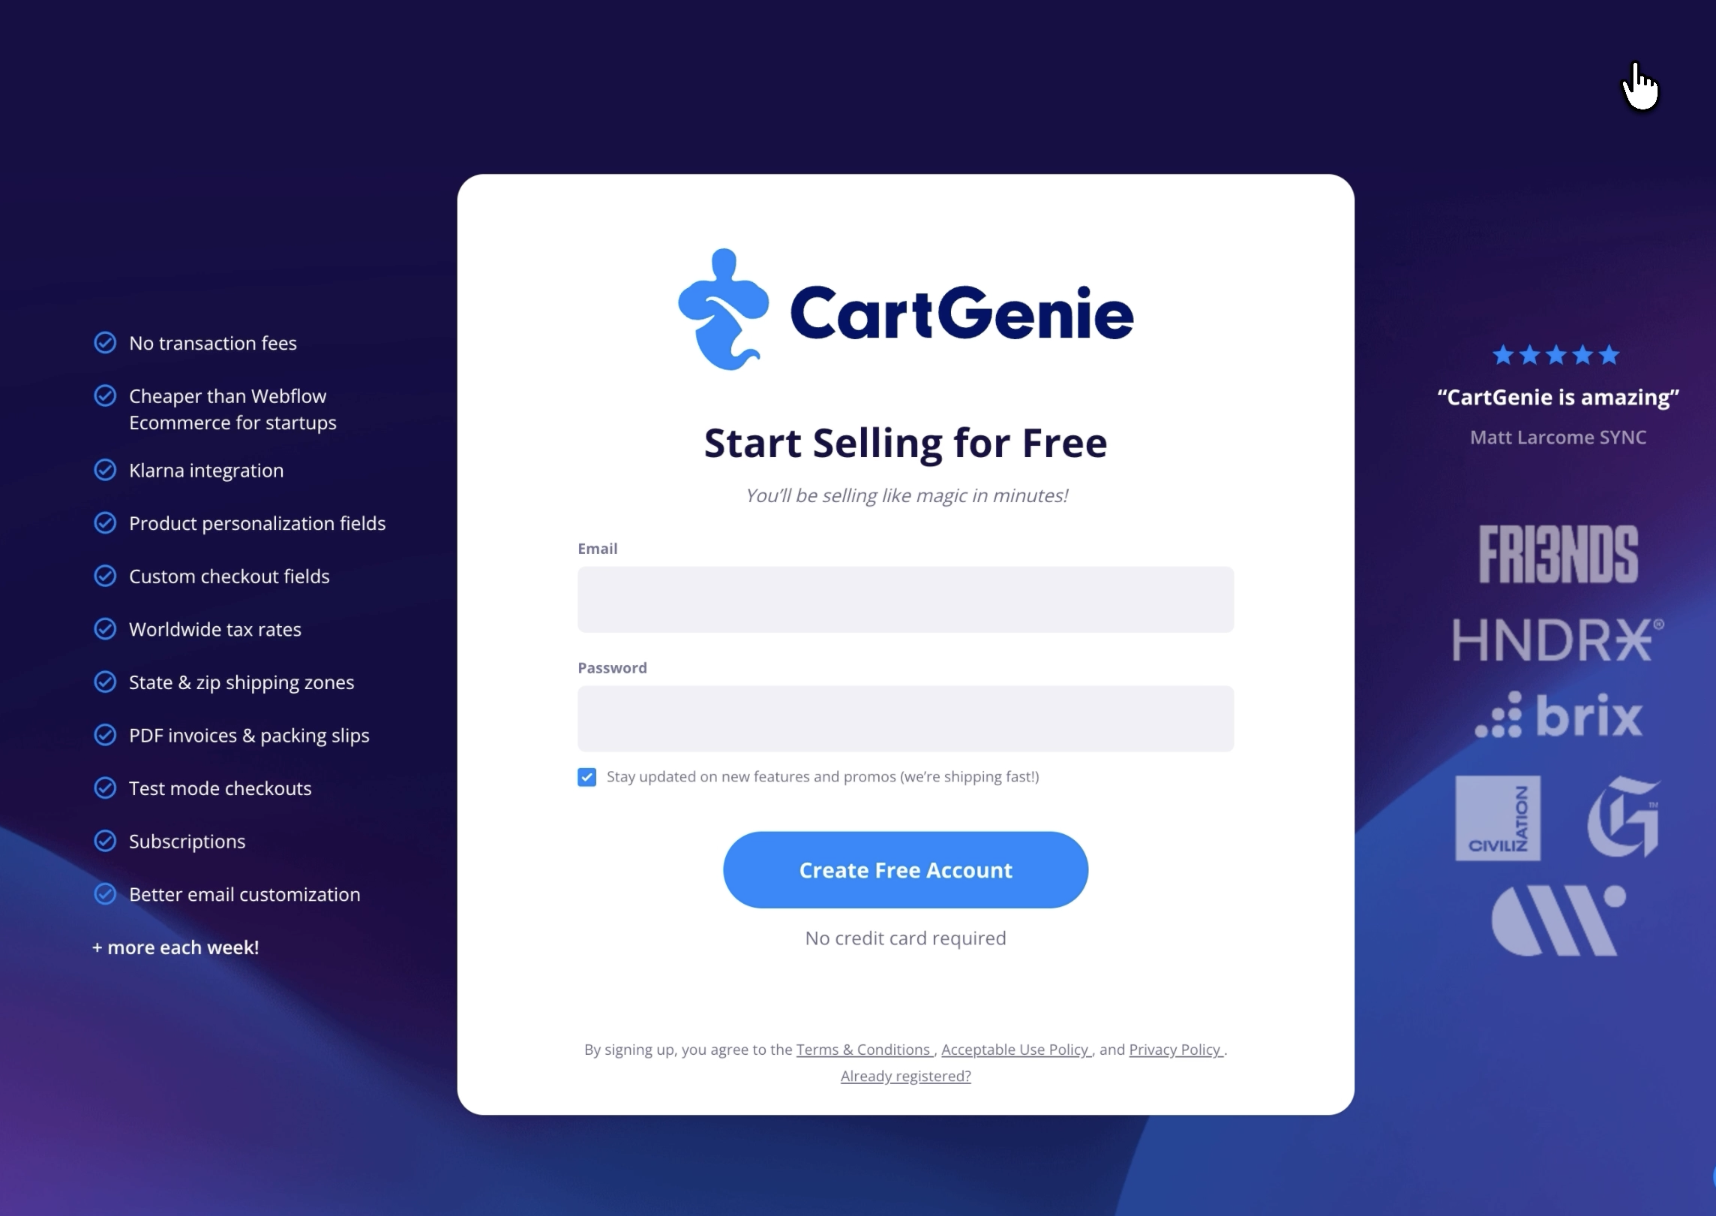
Enter your Email and password to create your account!
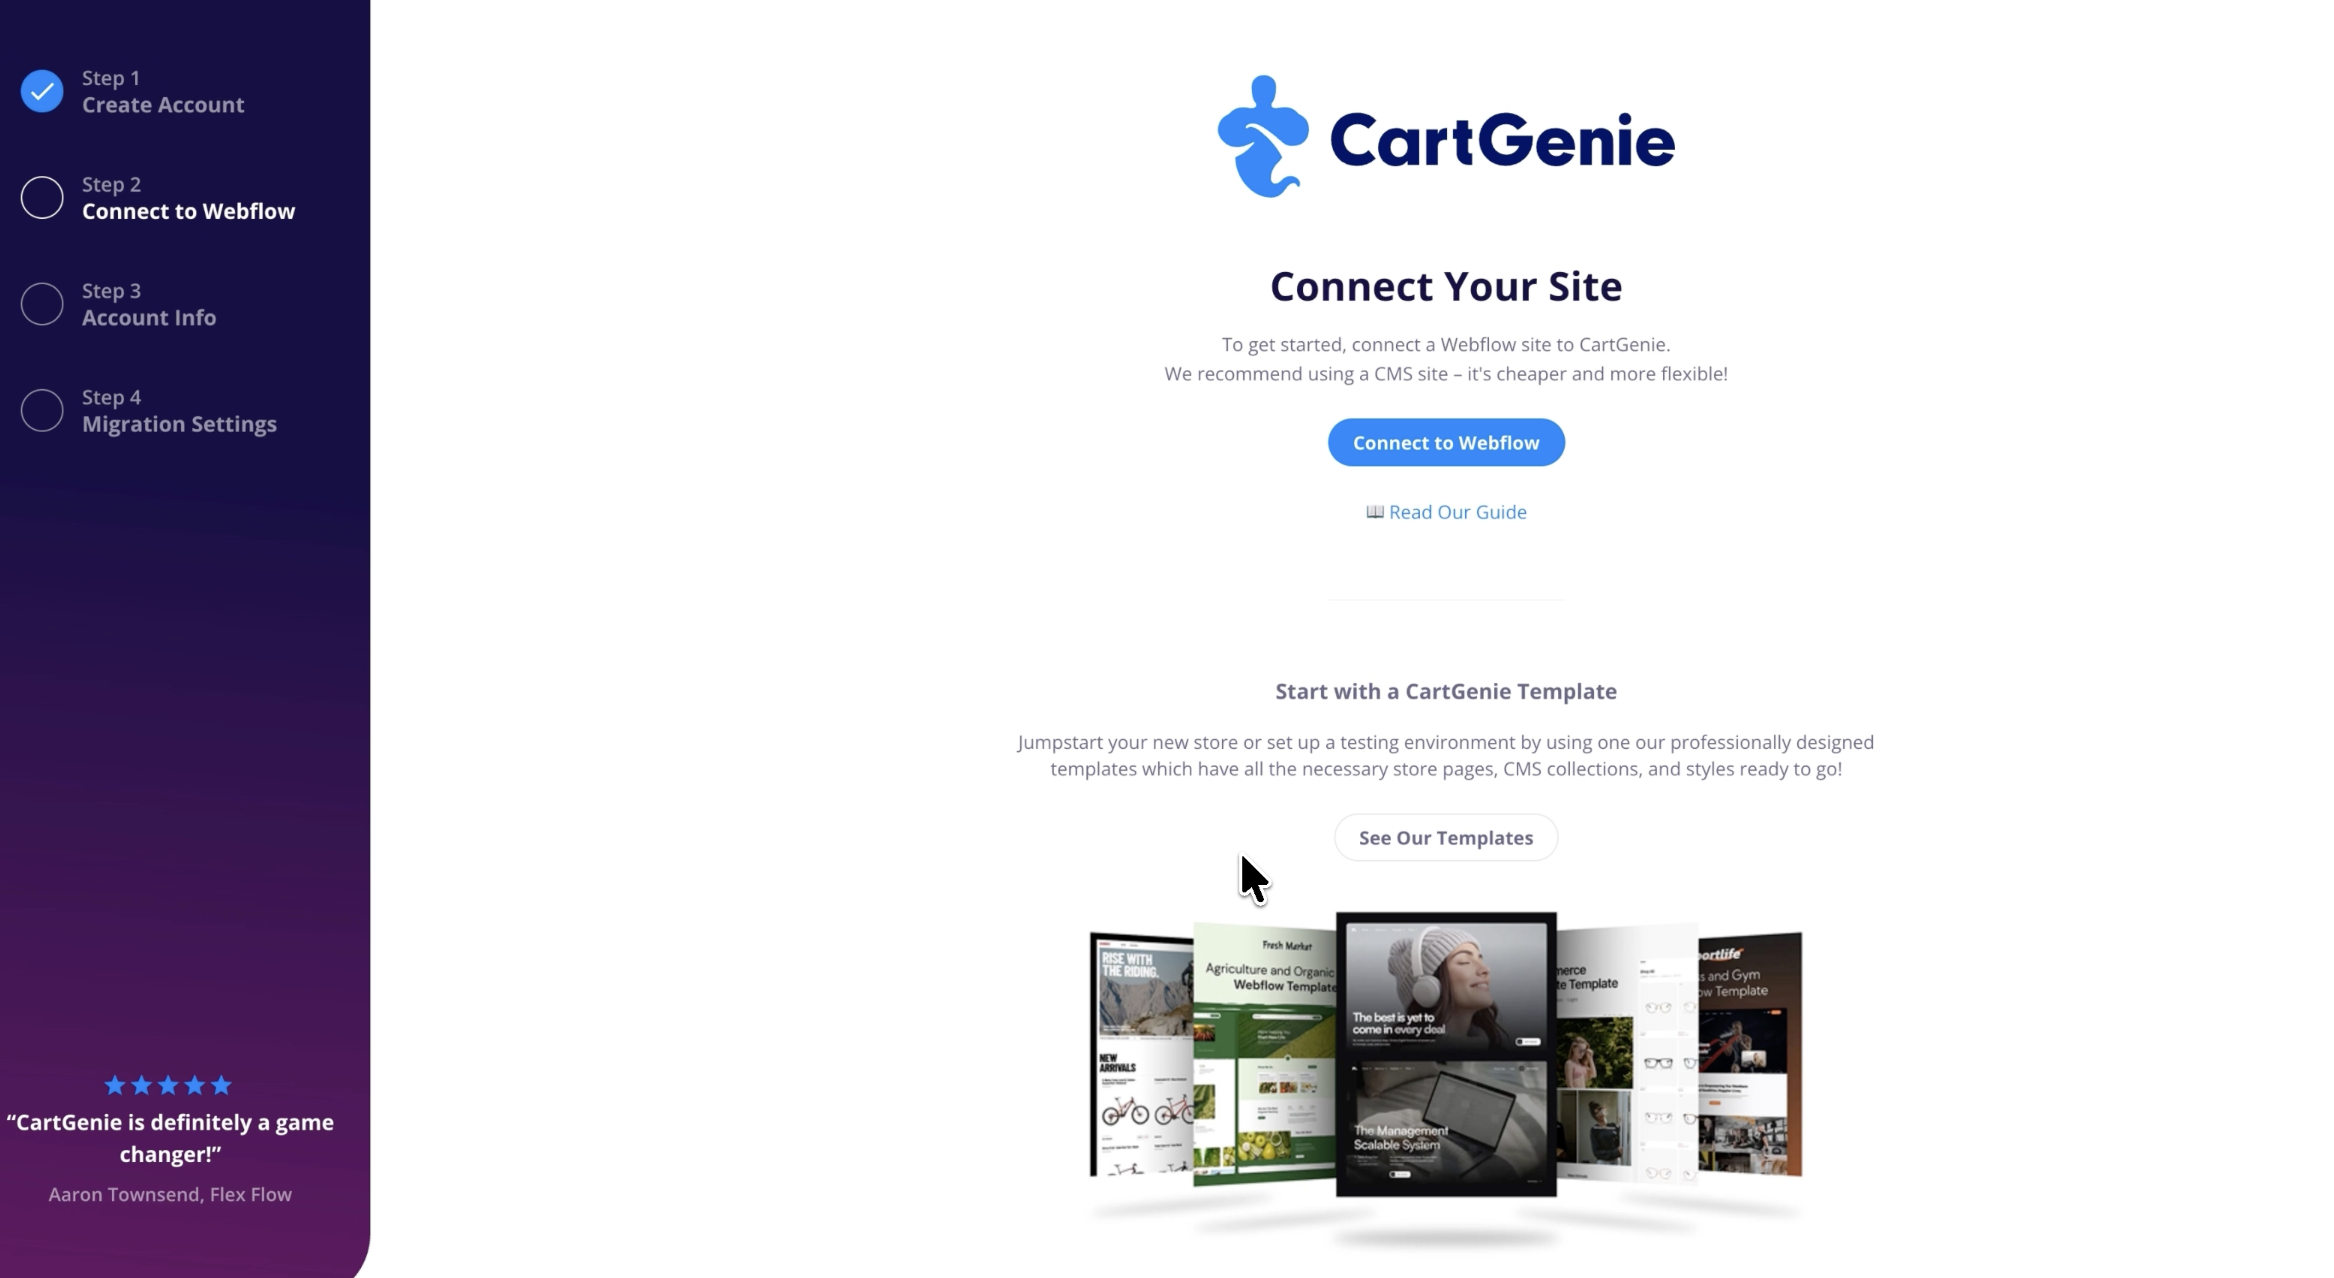
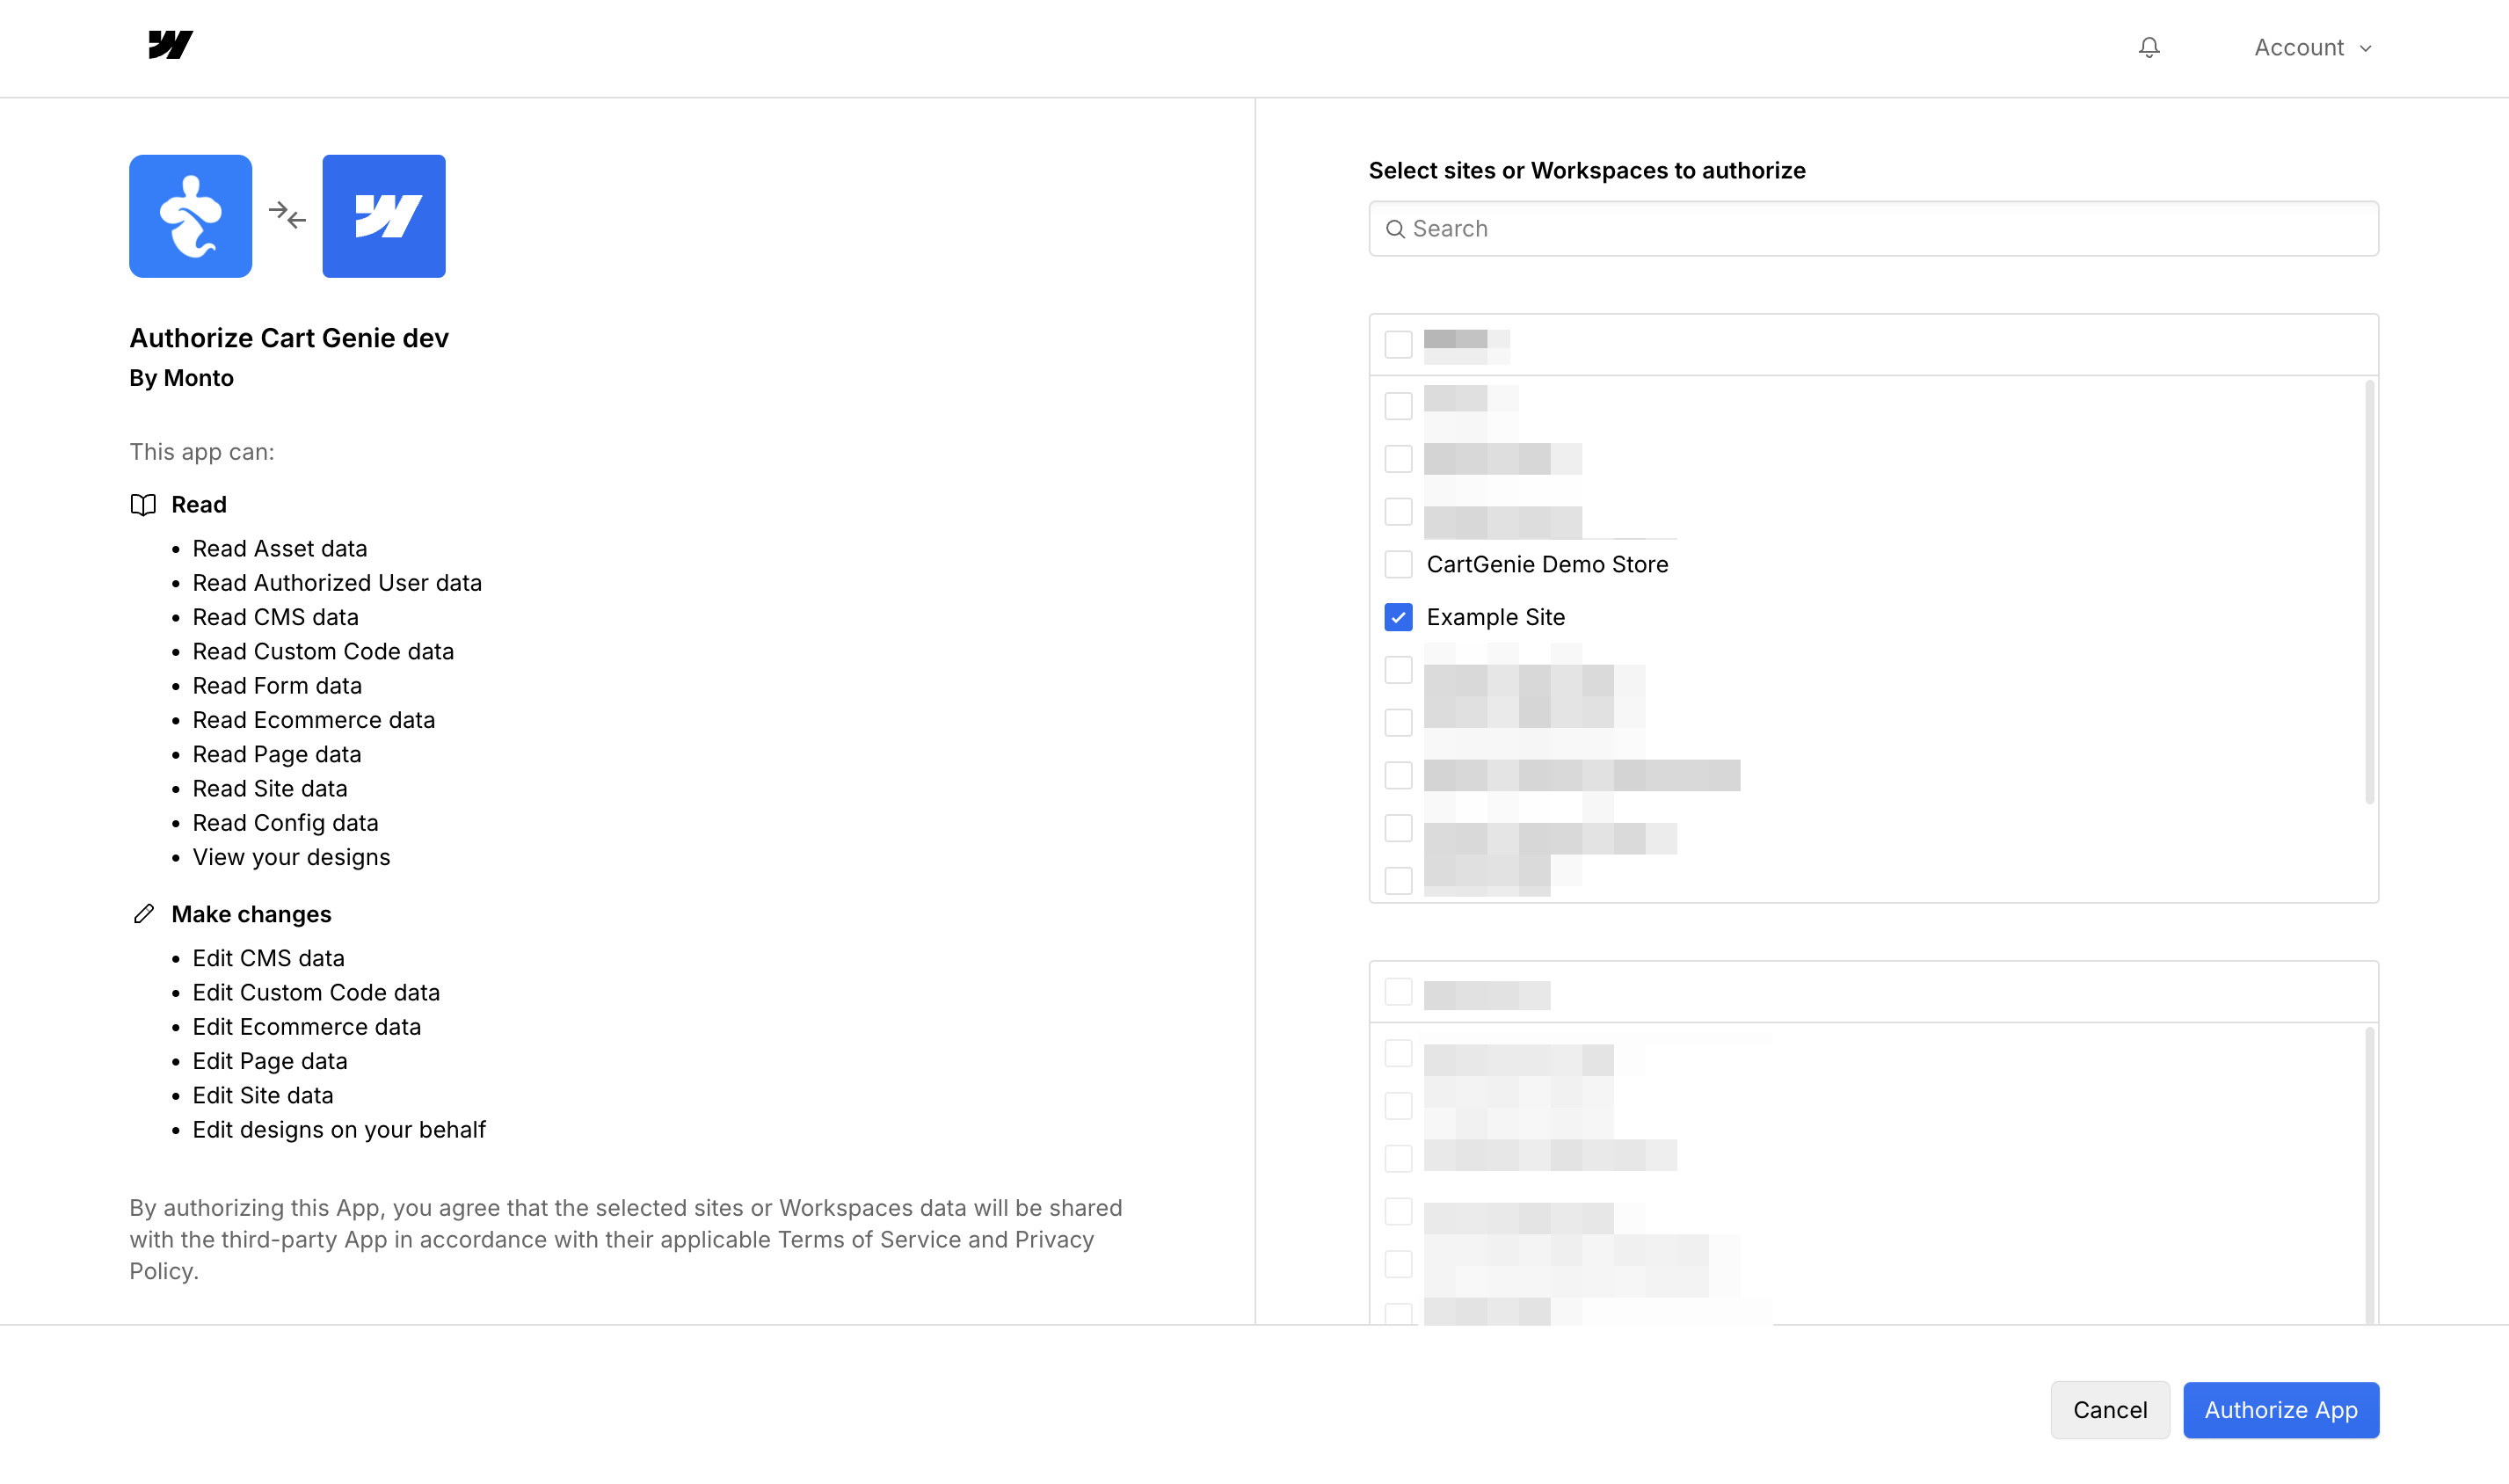
Click on the Connect to Webflow button to get started. You’ll be taken to an authorization screen within Webflow where you can choose which website you want to use for your store.
We recommend using a Webflow CMS site for your CartGenie store (even if migrating from Webflow Ecommerce). It is cheaper and has less restrictions than a Webflow Ecommerce site.
Once authorized, you’ll be taken to step 3 to add your account information.
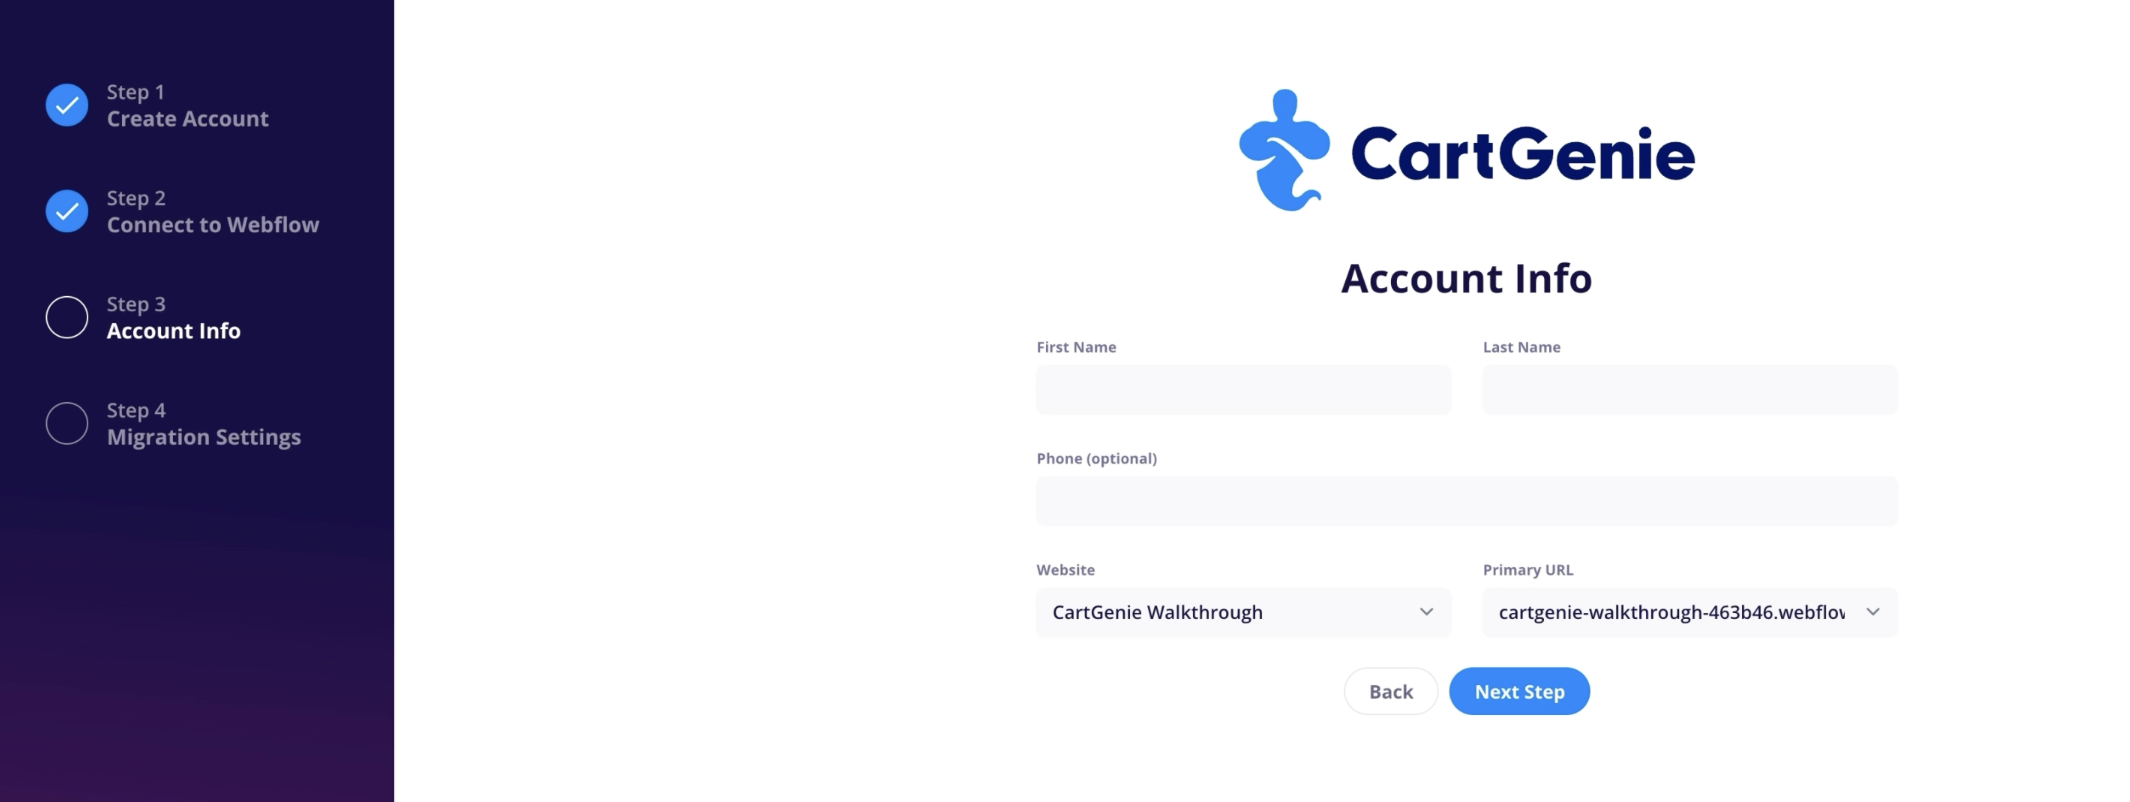
First & Last Name: This is your personal first and last name and will be used to identify you as a user of the account (the store name will be set later in Settings).
Website: This is the Webflow site you selected in the previous step.
Primary URL: Choose which URL you prefer to use as your primary domain (You can change this option later in Settings if needed)
If you wish to migrate existing Webflow Ecommerce orders, products, and categories, you can do this here. CartGenie can pull these items from any Webflow Ecommerce site you own automatically into a CMS site with just a few clicks!
See our full migration guide here:
Migrating a Webflow Ecommerce site to CartGenie
How to migrate your existing Webflow Ecommerce site to CartGenie
Once you’ve created your account and logged in, you’ll be taken to our interactive Setup Guide! Here you can see everything you need to do before your store is ready to go live.
View My Setup Guide
In order for us to sync your CartGenie products and categories to your Webflow site, you must first create the necessary CMS collections that will house them. We can generate these for you to ensure they contain the numerous required custom fields for each.
Create / Connect My CMS
I’m using a CartGenie template
If you’re using a CartGenie template, be sure to enable the toggle option and connect the dropdowns to the already created CMS collections.
Read our full template guide here:
Creating a store using a CartGenie template
If you're using a CartGenie template, follow this guide to set up your site
In order for your customers to purchase items in your store, you must first connect a payment gateway to your CartGenie account. You may add one or more payment gateways.
Note: You can test the checkout process without a payment provider by turning on the “Enable Test Orders” option on the Payment settings page.
Connect Payment Gateways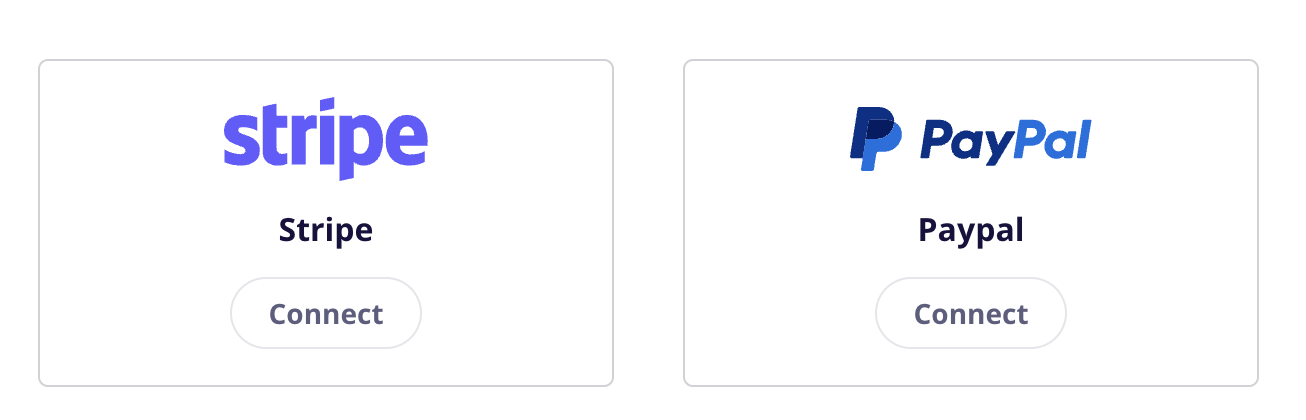
It's time to create your products and categories in CartGenie! Go to the Products tab and start creating them, adding all the important information such as name, description, image, price, etc. You can also import products from another cart system using our formatted template.
Note: You won’t be able to publish any shippable products to your Webflow site until you set up shipping zones in a later step.
Add Products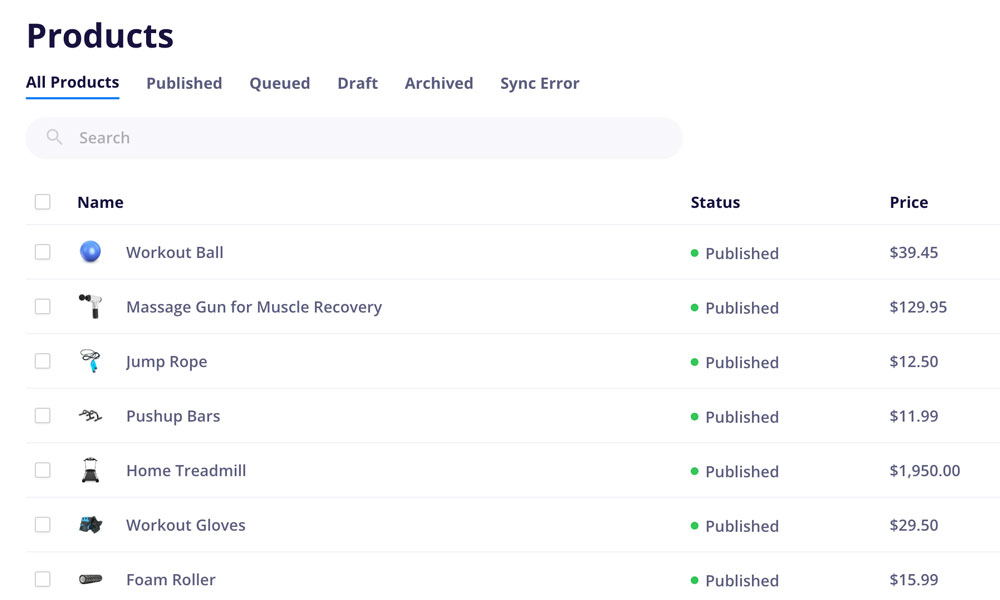
Create the required checkout and confirmation pages using CartGenie’s Designer Extension in Webflow (or connect your existing pages in Settings > WF Settings).
Next, paste in CartGenie’s pre-built page template using the Designer Extension to ensure all necessary components and custom attributes are included. Or use our extension to connect your existing design (be sure to use the Page Validator function to ensure all required elements are included!).
Once your pages are set up, connect each store block to the corresponding CMS fields so product details populate dynamically.
Read Full Guide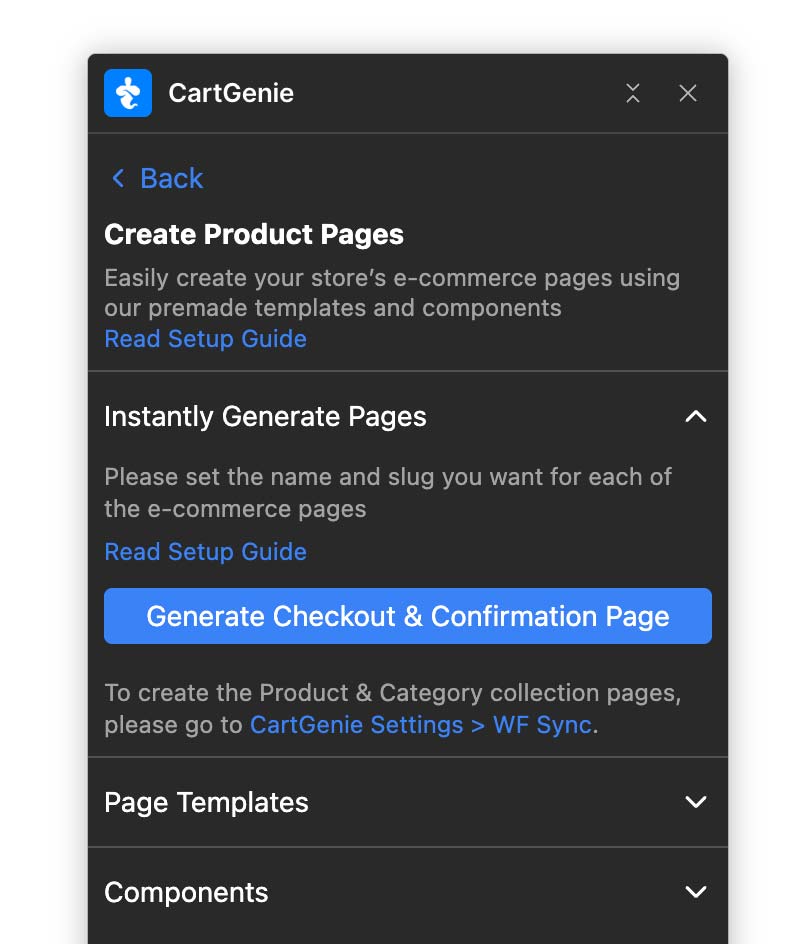
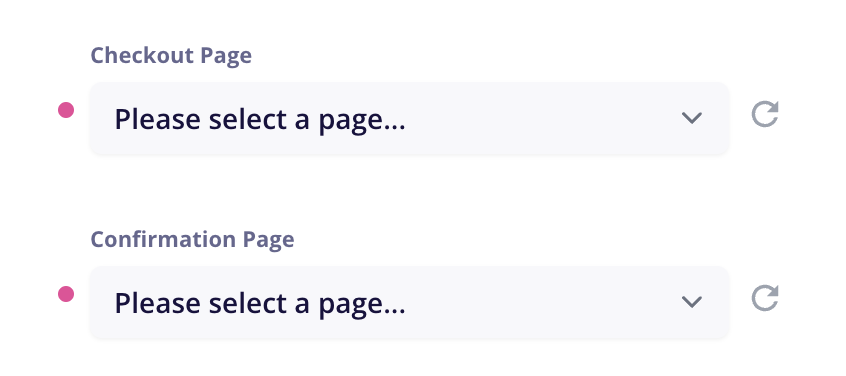
I’m using a CartGenie template
If you’re using a CartGenie template, your site should already have the necessary Checkout and Confirmation page, you can enable the toggle here and select those from the dropdown.
Display your products by adding them to your homepage or creating a dedicated store page using a CMS Collection List block, making it easy for customers to browse and shop. Then, customize your store pages in Webflow to match your brand’s look and feel, ensuring a seamless shopping experience with a fully styled and cohesive design.
Read Full Guide
Before you can start selling, there are a few bits of information we need about your store such as the legal name of your business, your address, your preferred currency and units (metric vs. imperial), and time zone.
Shipping zones enable shipping to specific locations, determine the shipping methods available in each, and the price of each option. Customers cannot check out if their cart contains shippable products (i.e. not digital or services or similar) and their shipping location is outside of your designated shipping zones.
In addition, you can also integrate with a fulfillment partner such as Shippo in order to easily pay for and print out shipping labels for your customers.
Add Shipping Zones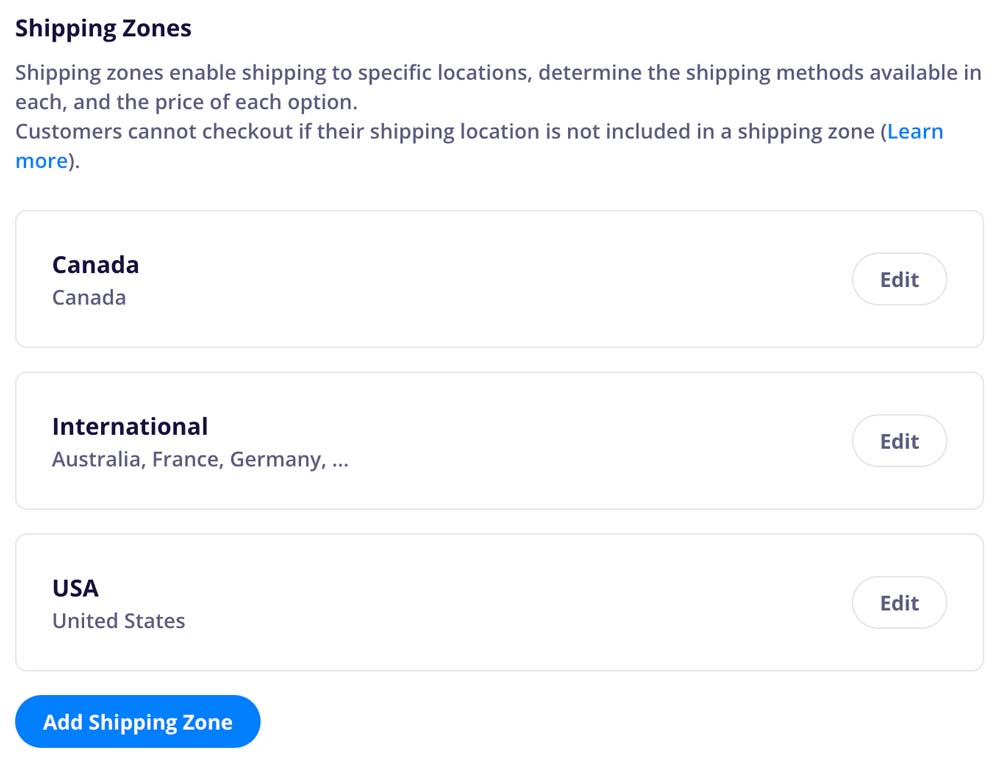
Want CartGenie to automatically add sales tax or VAT at checkout? Start by creating tax jurisdictions for each region or country where you need to collect tax. You’ll be able to specify the exact rate for each jurisdiction and even decide whether to apply tax to shipping.
You can also add tax classes for any special product types—like digital downloads, e-books, or other items with unique tax rules.
Add Tax Settings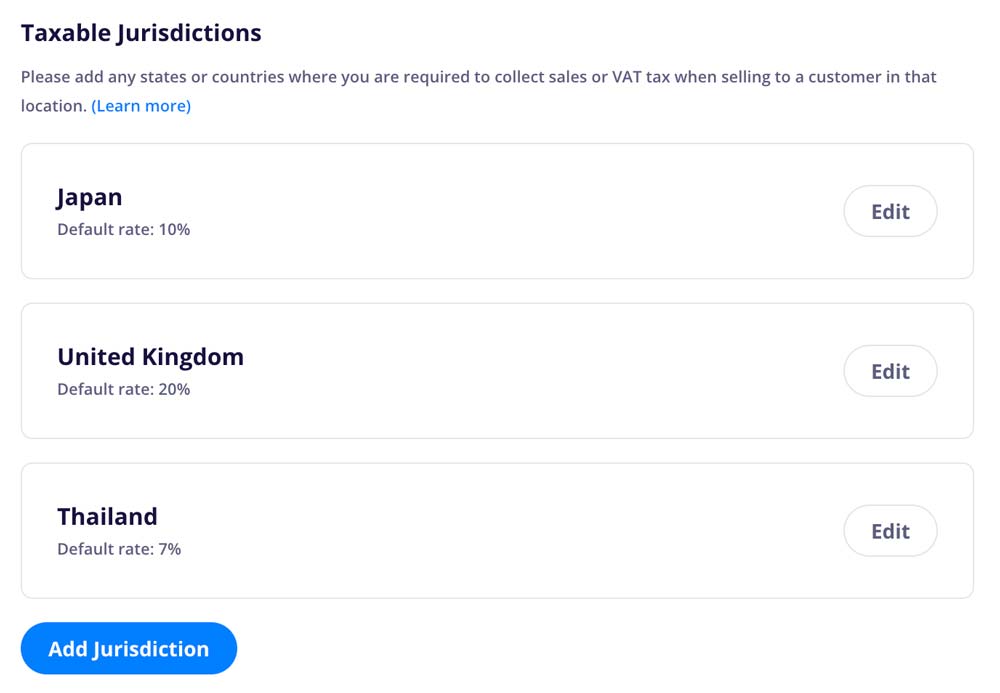
Upload your logo, customize your email colors, and edit the text of your store’s emails to ensure it matches your brand voice. You can also add extra recipients to order notification emails and other important events to ensure that the right person on your team is notified.
Customize My Emails
In order for your store to function correctly, you’ll need to add the CartGenie global header script to your Webflow site. You can do this simply by opening our CartGenie Designer Extension in the Webflow designer. Your header script will be added automatically!
Note: You must publish your Webflow site before we can verify the script.
If you’ve completed all the previous steps, your CartGenie is ready to go! The last step is to publish your site so that all your store pages and products are live and able to be purchased.
Tip: You can test your store’s checkout process by enabling the test option in Payment Gateway settings and using a special credit card number.
See Full Guide
